

Hover Textual content is an fascinating macOS accessibility function that magnifies the textual content that’s displayed in your display. This may be any common textual content, a menu merchandise, or a button. Because the identify suggests, once you hover your mouse cursor over the textual content, macOS will amplify and show a high-resolution zoomed model of the textual content in a separate window. This makes studying content material an entire lot simpler, whether or not the font measurement is tiny, or even when the display is much away from the place you’re seated.
That is an accessibility function, however actually anybody who use computer systems with high-resolution shows can doubtlessly discover utility on this functionality. Anybody who has used any trendy gadget is aware of how troublesome it may be to learn tiny textual content typically, so being able to amplify textual content is clearly useful. Positive, you’ll be able to increase system text size by using a scaled display resolution, however that’s not all the time sensible, and even doable. Whether or not you may have a multi-monitor setup, are utilizing a show that’s at a variety (as is commonly the case when giving shows or using a TV as external display), or even when your eyesight is lower than excellent, that is precisely the place Hover Textual content turns out to be useful on the Mac.
How one can Use Hover Textual content to Amplify Any Textual content on Mac
Earlier than you get began, be sure that your Mac is working macOS Catalina or later since Hover Textual content isn’t accessible in older variations. Now, let’s see what you could do:
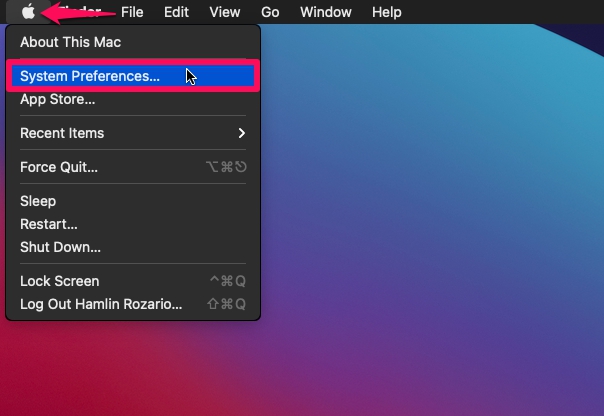
- Click on on the Apple menu from the top-left nook and select “System Settings” (macOS Sonoma, Ventura, and newer) or “System Preferences” (macOS Monterey and earlier) from the dropdown menu.
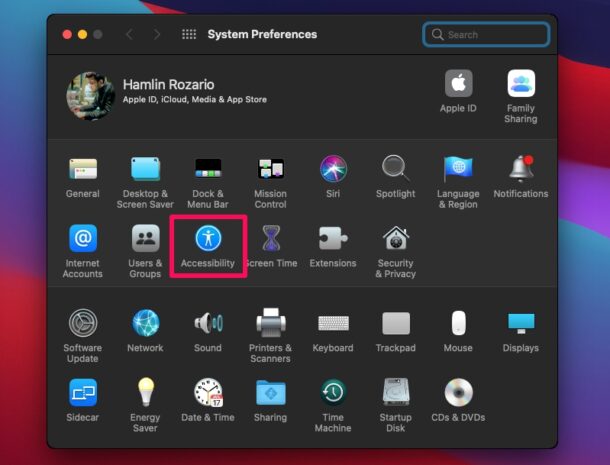
- As soon as the System Preferences panel opens up, click on on “Accessibility” as proven within the screenshot beneath.
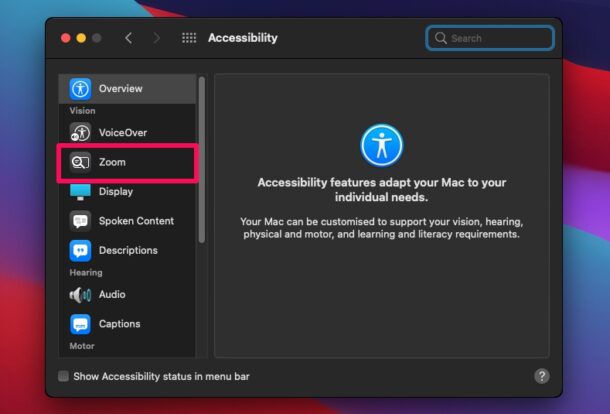
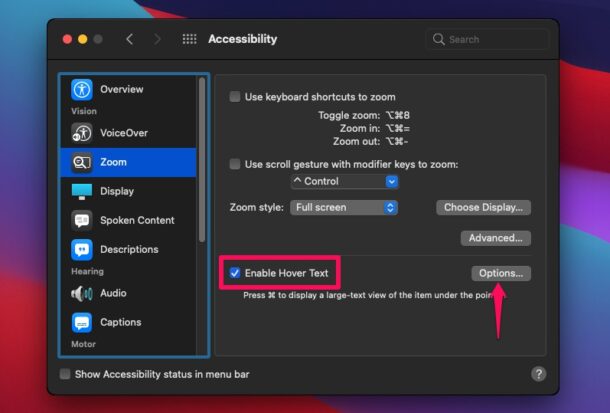
- This can take you to the Overview part of accessibility settings. Right here, choose “Zoom” from the left pane to proceed.
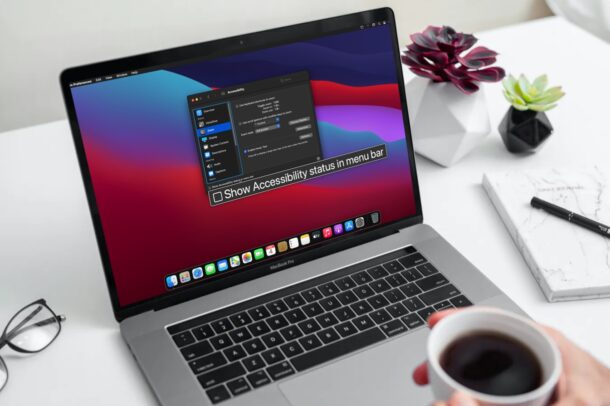
- Now, verify the field subsequent to “Allow Hover Textual content”. To additional customise this function, click on on “Choices” proper subsequent to it.
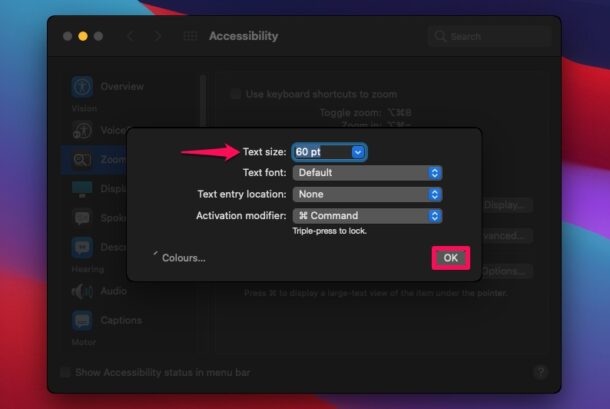
- This gives you entry to extra settings for the Hover Textual content function the place you’ll be able to change the textual content measurement, font fashion, and activation modifier. When you’re carried out making the adjustments, click on on “OK”.
- As per the default settings, for those who hover the cursor over any textual content that’s displayed in your display whereas urgent the Command key, macOS will carry up the zoomed model proper beneath it, as you’ll be able to see beneath.
There you go. You’ve discovered find out how to make use of Hover Textual content to make studying simpler in your Mac.
By default, the Command secret is the activation modifier for Hover Textual content. Nonetheless, this may be modified to a distinct key if desired, however you can’t utterly take away it.
Having to press the activation key each time you need to use Hover Textual content is likely to be inconvenient for lots of customers, particularly for those who depend on it very often. In such instances, what you are able to do is press the activation key thrice to lock Hover Textual content after which use it as a lot as you need. When you’re carried out, you’ll be able to triple-press the important thing once more and exit Hover Textual content mode.
If you happen to use a MacBook with a Contact Bar, you’ll have entry to a different related function referred to as Contact Bar Zoom in the identical menu proper beneath Hover Textual content. Enabling this can carry up the Contact Bar on the backside of your MacBook’s display everytime you maintain your finger on the Contact Bar.
We hope you had been capable of make good use of Hover Textual content everytime you wanted an additional hand to learn written content material in your display. What’s your general tackle this nifty accessibility function and the way typically do you utilize it? What different macOS accessibility options have you ever tried up to now? Do share your experiences and drop your invaluable opinions within the feedback part down beneath.