

Are you unable to replace your MacBook and getting the error “macOS Sonoma can’t be put in on Macintosh HD”? You aren’t alone. Many customers have skilled this whereas attempting to replace to the most recent model of macOS Sonoma. We’ve got created this detailed information that will help you remedy it very quickly. Observe alongside!
Why Am I Getting the Error “macOS Sonoma Can’t Be Put in On Macintosh HD”?
Some causes that might be inflicting this error are usually not sufficient space for storing, {hardware} compatibility points, unstable web connection, VPN errors, or a corrupted startup disk.
There might be a plethora of different causes for the error, however the above are the commonest ones. With out additional ado, let’s dive into the options.
Repair macOS Sonoma Can’t Be Put in On Macintosh HD
1. Test Storage Area
If the macOS Sonoma can’t be put in on Macintosh HD, it might be due to inadequate space for storing. macOS updates require a big quantity of free area to put in. Therefore, it’s essential to delete massive recordsdata corresponding to media, motion pictures, and many others…, or test what a part of your MacBook takes up essentially the most area.
Time wanted: 2 minutes
Right here is how you are able to do it.
- Go to the Apple menu on the top-right nook of the display screen.
- Then, click on on System Settings.
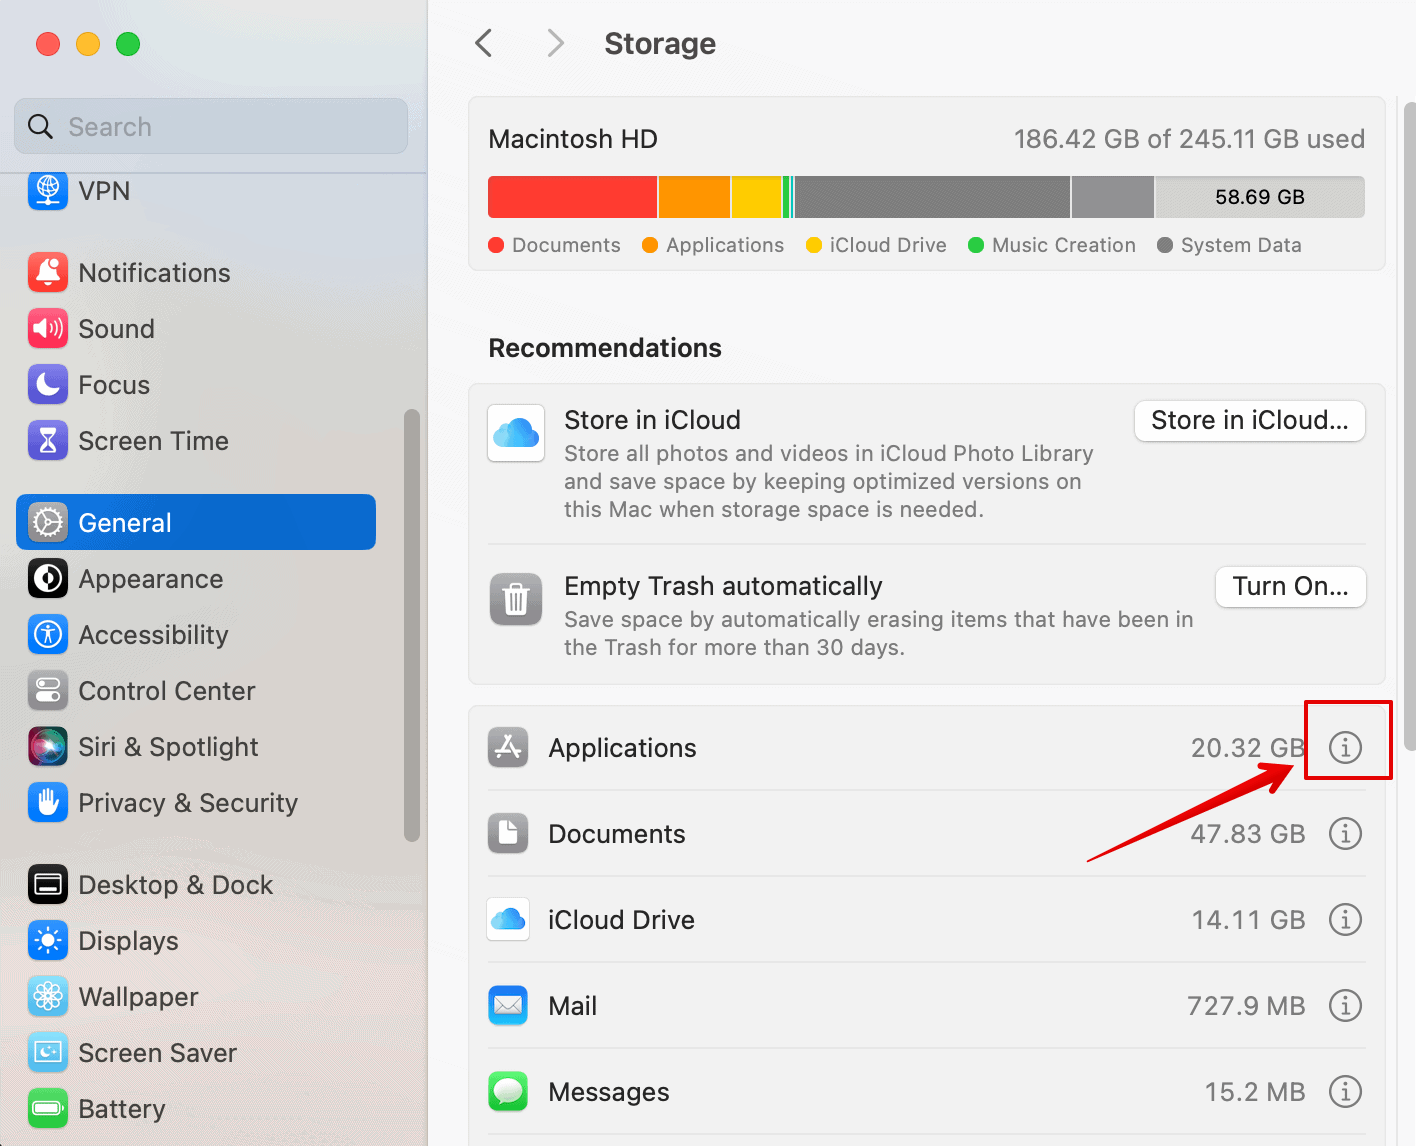
- Open Basic on the left sidebar and choose Storage on the correct.

- Look ahead to a number of seconds whereas the system calculates the storage capability.

Now you can test the area acquired by every a part of your system, corresponding to Purposes, Paperwork, Mail, Messages, and many others. Here’s what you are able to do to release some storage.
- Click on on the i icon beside the Purposes folder.
- Choose the app you not use and click on on Delete.

- Then, click on on Delete once more to verify.
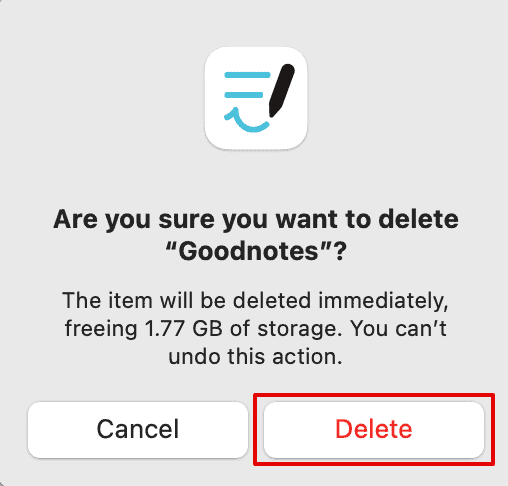


The app might be faraway from the system. You may repeat this course of for different apps or paperwork.
2. Test Your Web Connection
As talked about above, another excuse for this error might be a poor web connection. You want a powerful and dependable connection to download and install macOS updates. Therefore, guarantee that there are not any points together with your Wi-Fi.
- Open a browser and test if the Wi-Fi is working correctly.
- Test the speed of the internet connection.
- Disconnect after which reconnect the Wi-Fi.
- Restart your router and hook up with the Wi-Fi once more.
- Don’t depend on cell hotspots for macOS updates.
3. Is Your MacBook Suitable?
Earlier than putting in macOS Sonoma, guarantee your MacBook is suitable with the replace. Apple sometimes lists suitable fashions for every macOS launch on its web site. In case your MacBook isn’t suitable, you can not set up macOS Sonoma.
Here’s a full record of all of the MacBooks suitable with macOS Sonoma.
- iMac 2019 and later
- iMac Professional 2017
- Mac Professional 2019 and later
- MacBook Professional 2018 and later
- Mac Studio 2022 and later
- MacBook Air 2018 and later
- Mac Mini 2018 and later
4. Set up in Protected Mode
If not one of the above strategies be just right for you, attempt downloading the macOS replace in Protected Mode.
Earlier than set up, create a backup of your Mac in order that you don’t lose any information throughout the set up. Additionally, plug within the charger so it doesn’t shut down whereas the set up progresses.
Listed below are the steps in addition your Mac in Protected Mode:
For Apple Silicon
- Go to the Apple menu and shut down your Mac.
- Now, press and maintain the ability button till the Startup choices seem on the display screen.
- Choose the startup disk. Then, press and maintain the Shift key in your keyboard.
- Click on on the Proceed in Protected Mode button.
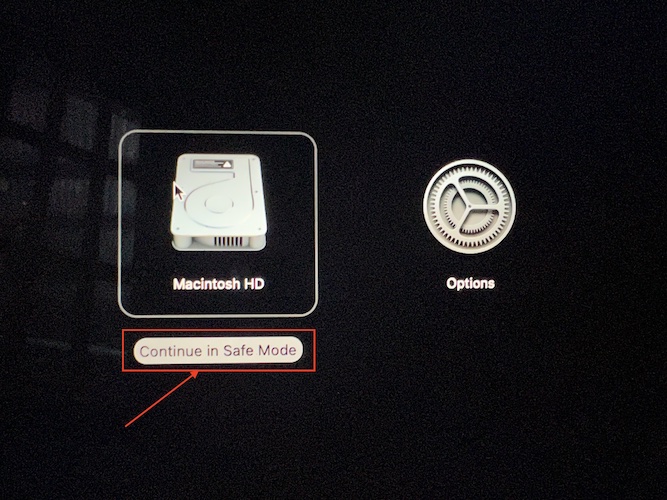
- Now, log in to your Mac. And proceed with the replace.

For Intel Processor
- Restart your Mac and rapidly press and maintain the Shift key whereas it begins.
- Then, launch the important thing while you see the login window on the display screen.
- Log in to your Mac.
After logging in, you possibly can see the Protected Boot written within the higher proper nook of the window. Now you can attempt updating your macOS.
5. Restore Startup Disk
Another excuse you’re getting the “macOS Sonoma Can’t Be Put in On Macintosh HD” error is due to a corrupted or broken Startup disk. Right here, you possibly can use Disk Utility to first repair the Startup Disk after which attempt putting in the replace once more.
We might be accessing Disk Utility immediately from the Purposes folder. Let’s take a look at the steps beneath to restore the Startup Disk.
- Open Finder from the Dock beneath and go to Purposes on the left sidebar.
- Scroll down and double-click on the Utilities folder to open it.
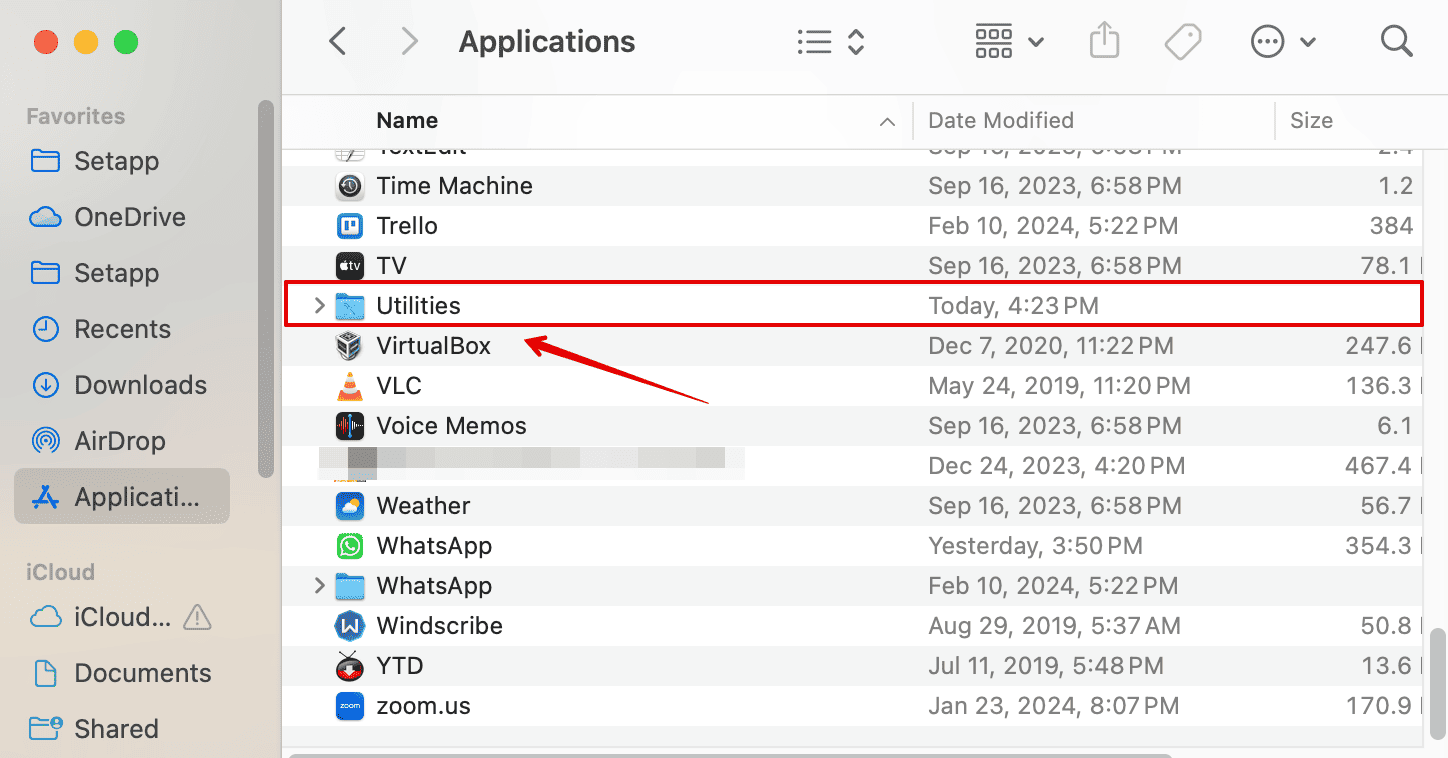
- Search for Disk Utility and double-click on it.

- Go to view on the highest menu bar and choose Present All Gadgets.
- Choose your disk on the left sidebar and click on First Assist within the top-right nook.
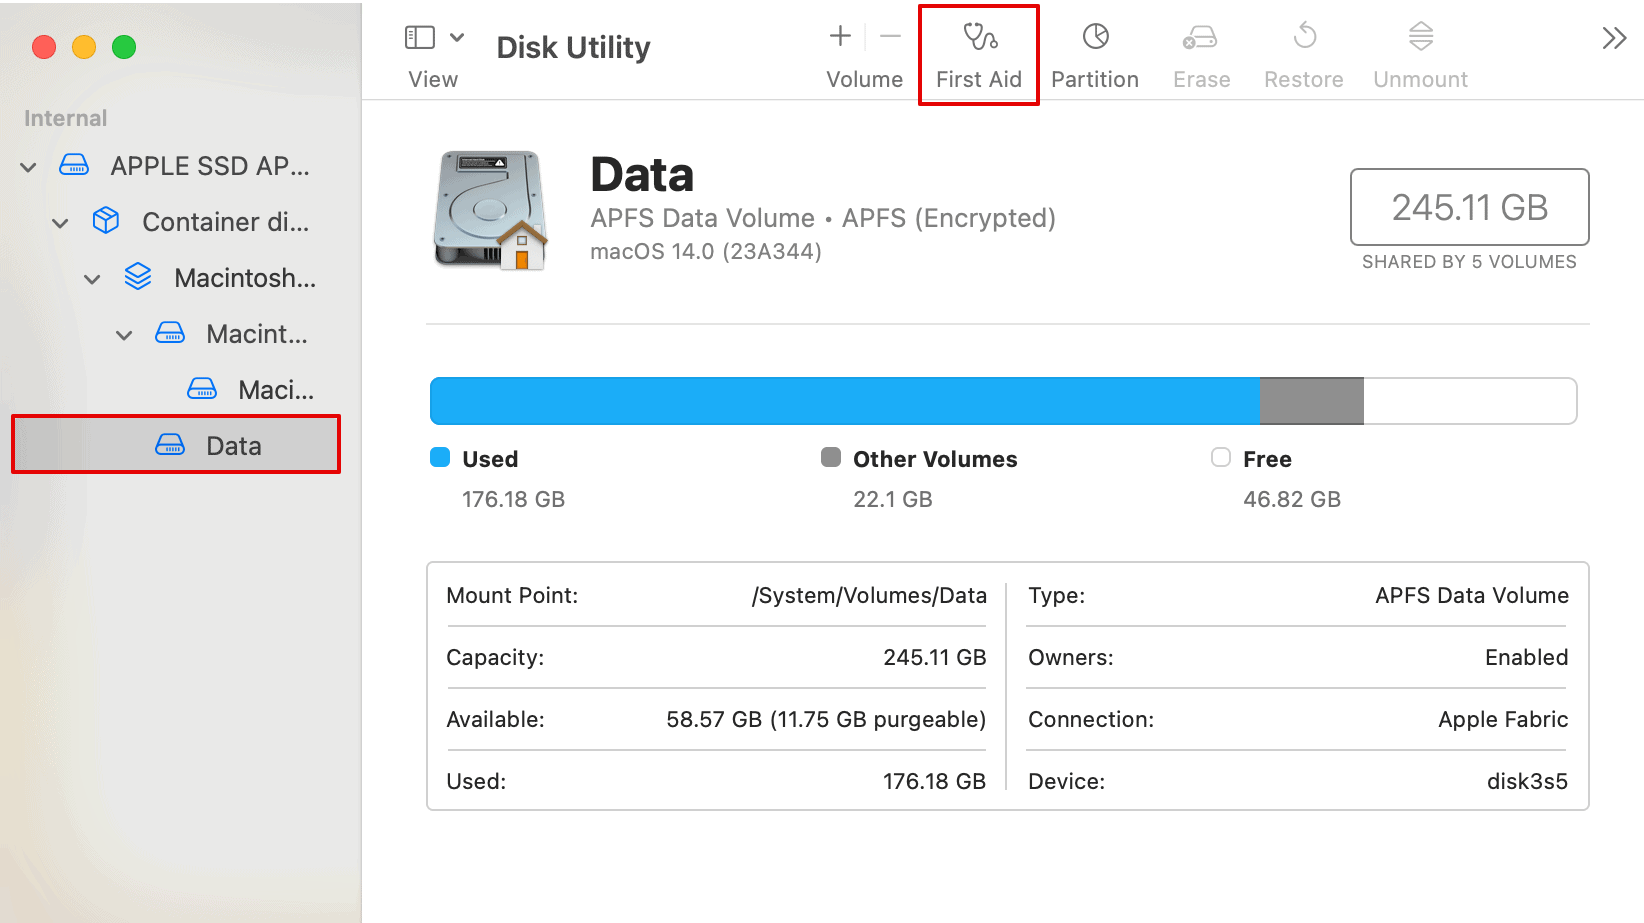
- Select Run.
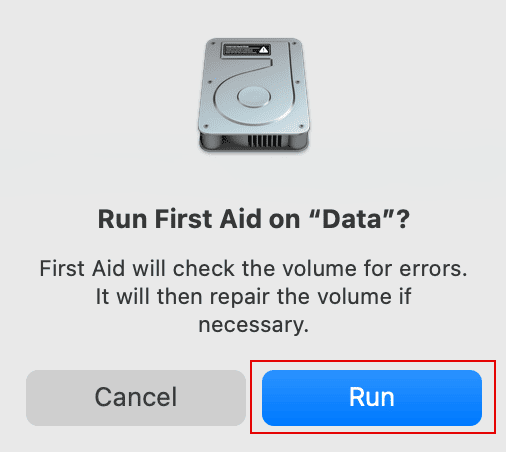


Look ahead to the method to finish. Then, do that for all of the containers of your disk, ranging from the underside. As soon as you’re carried out repairing, attempt putting in macOS Sonoma once more.
6. Replace from macOS Restoration
Our final resort is updating the MacBook from macOS Restoration. Once you replace from macOS Restoration, you carry out a recent set up of macOS Sonoma. This could repair any corrupted or broken system recordsdata that could be inflicting the replace error.
This additionally provides you entry to instruments corresponding to Disk Utility, which you should use to restore your Startup Disk. Moreover, this course of preserves your person information and settings, so that you received’t lose any recordsdata or customization throughout the replace course of.
Earlier than you begin the method, ensure your MacBook is switched off.
For Apple Silicon
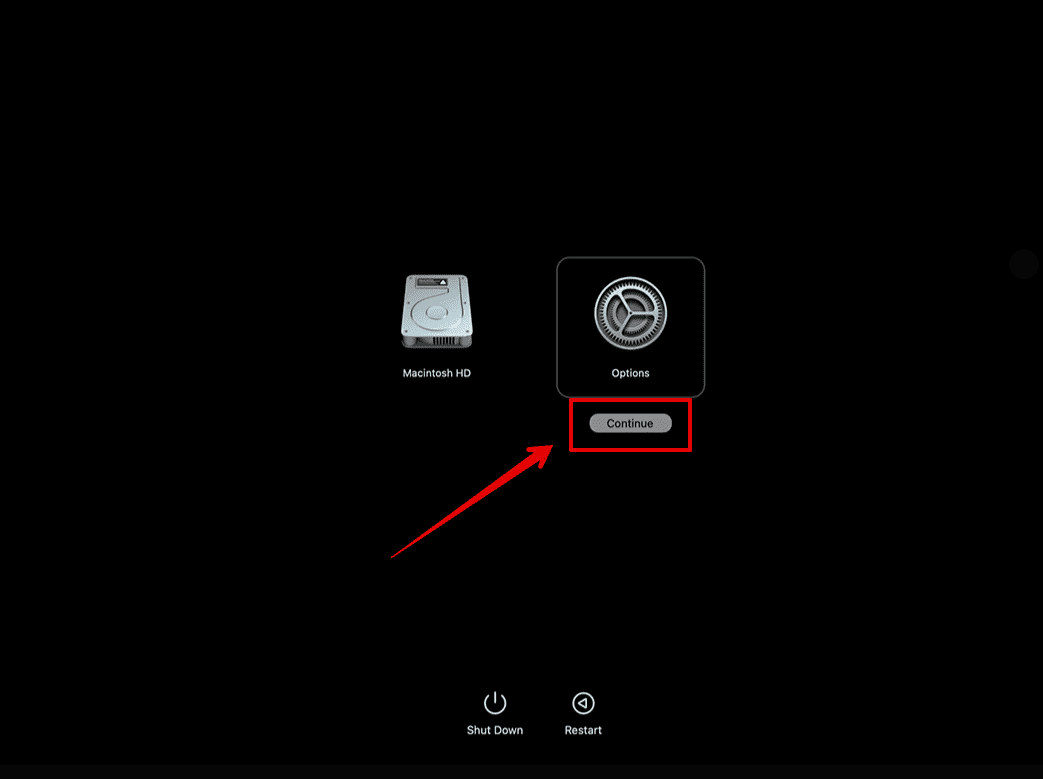
- Press and maintain the ability button till you see the startup choices on the display screen.
- Click on on the Gear icon labeled as Choices.
- Then, choose Proceed.

For Intel-based MacBooks
- Flip in your MacBook.
- Then, press and maintain the Command + R keys on the keyboard until you see the Apple brand on the display screen.
- Log in to your system, and you’ll enter the macOS Restoration Mode.
- You may then choose the Reinstall macOS Sonoma choice and start the set up.
Though this course of doesn’t take away any information out of your system, making a Time Machine backup of all of your information remains to be really useful in case something goes fallacious.
Did any of the above strategies be just right for you? Tell us within the remark part beneath.