On this tutorial, I’ll present you the way to flip a USB drive right into a macOS Sequoia USB installer. Having a USB installer is helpful for performing upgrades to Sequoia throughout a number of Macs, amongst different use circumstances. Watch my full video walkthrough, and make sure you subscribe to 9to5Mac on YouTube for extra Mac guides, how-tos, opinions, and so forth.
Earlier than we start, it’s necessary to notice {that a} USB installer shouldn’t be a requirement to put in macOS 15. Upon its launch, you’ll have the ability to use the App Retailer to obtain Sequoia or set up macOS by way of Restoration mode. As famous at first, one of many main advantages of making a Sequoia USB set up drive is that it permits you to set up it throughout a number of Macs.
Selecting a USB drive
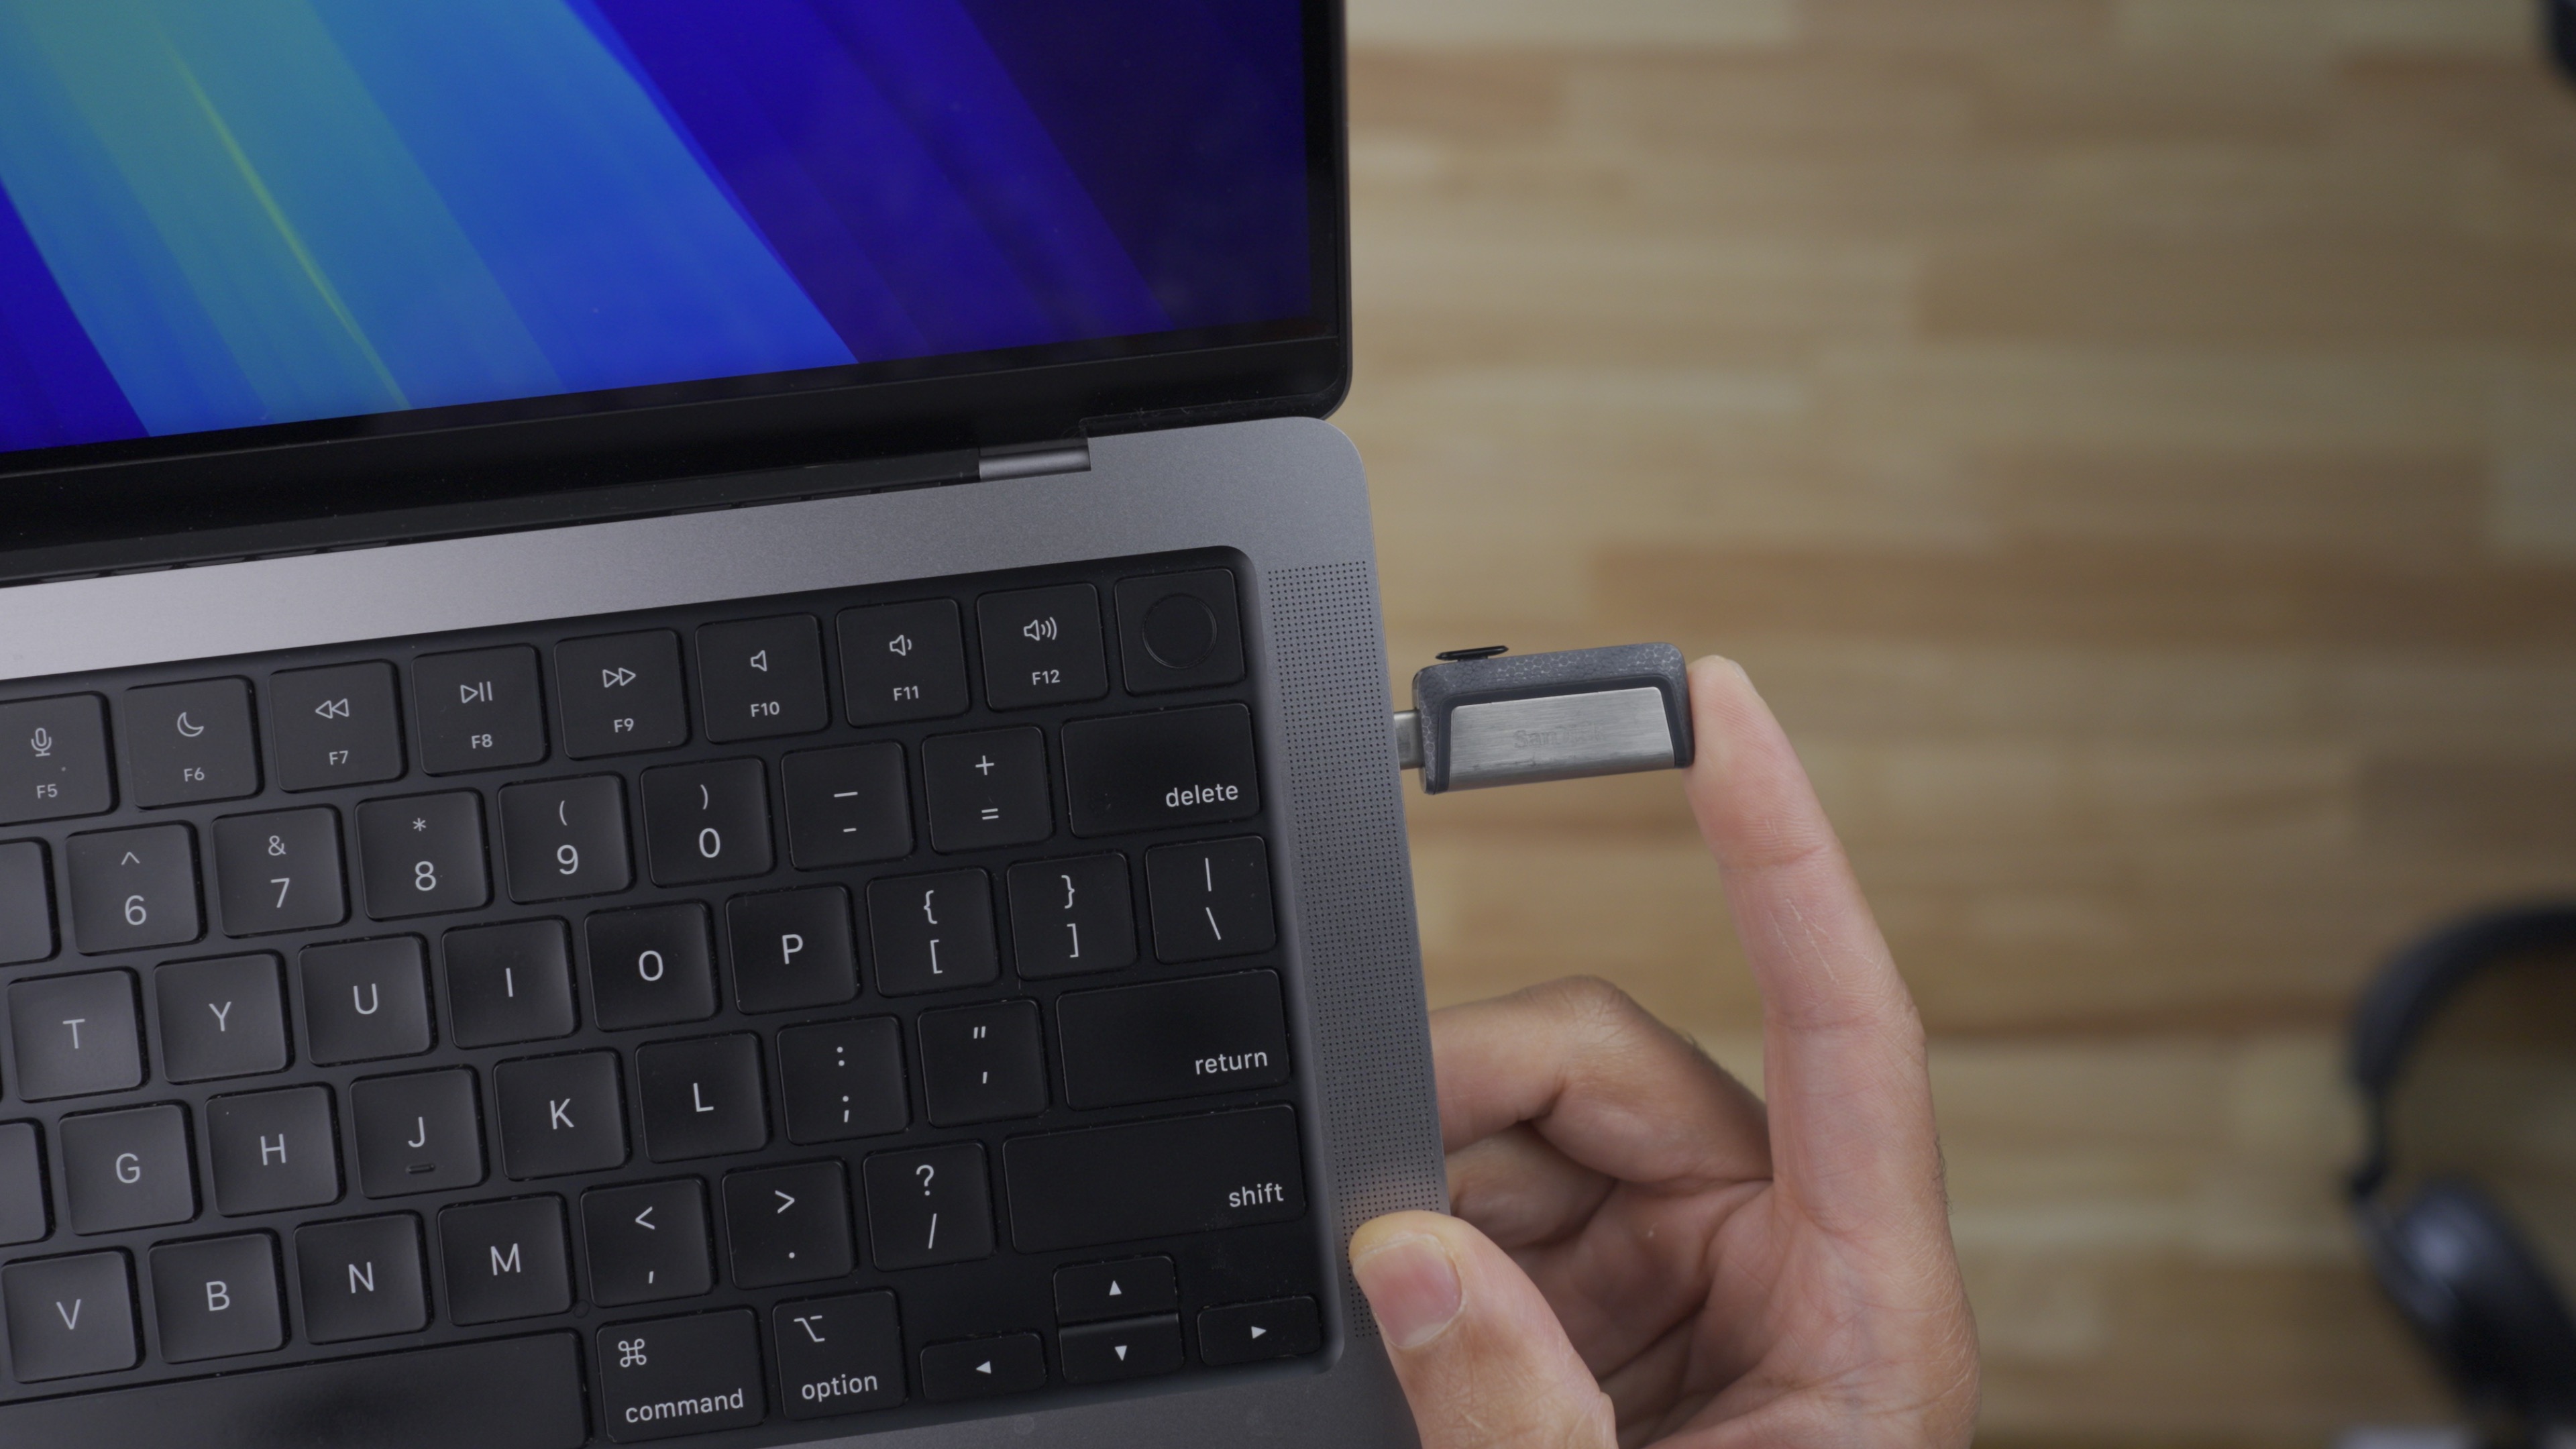
To observe this tutorial, you’ll want entry to a USB drive to function the set up vacation spot. A USB flash drive will work, so long as it has a minimum of 16 gigabytes of storage. I’m utilizing a conveyable SanDisk flash drive with each USB-C and USB-A connections for added flexibility. You can purchase the same USB flash drive, with 32GB of storage for a really cheap worth.
macOS Sequoia USB installer video tutorial
Subscribe to 9to5Mac on YouTube for more videos
Obtain the macOS Sequoia installer
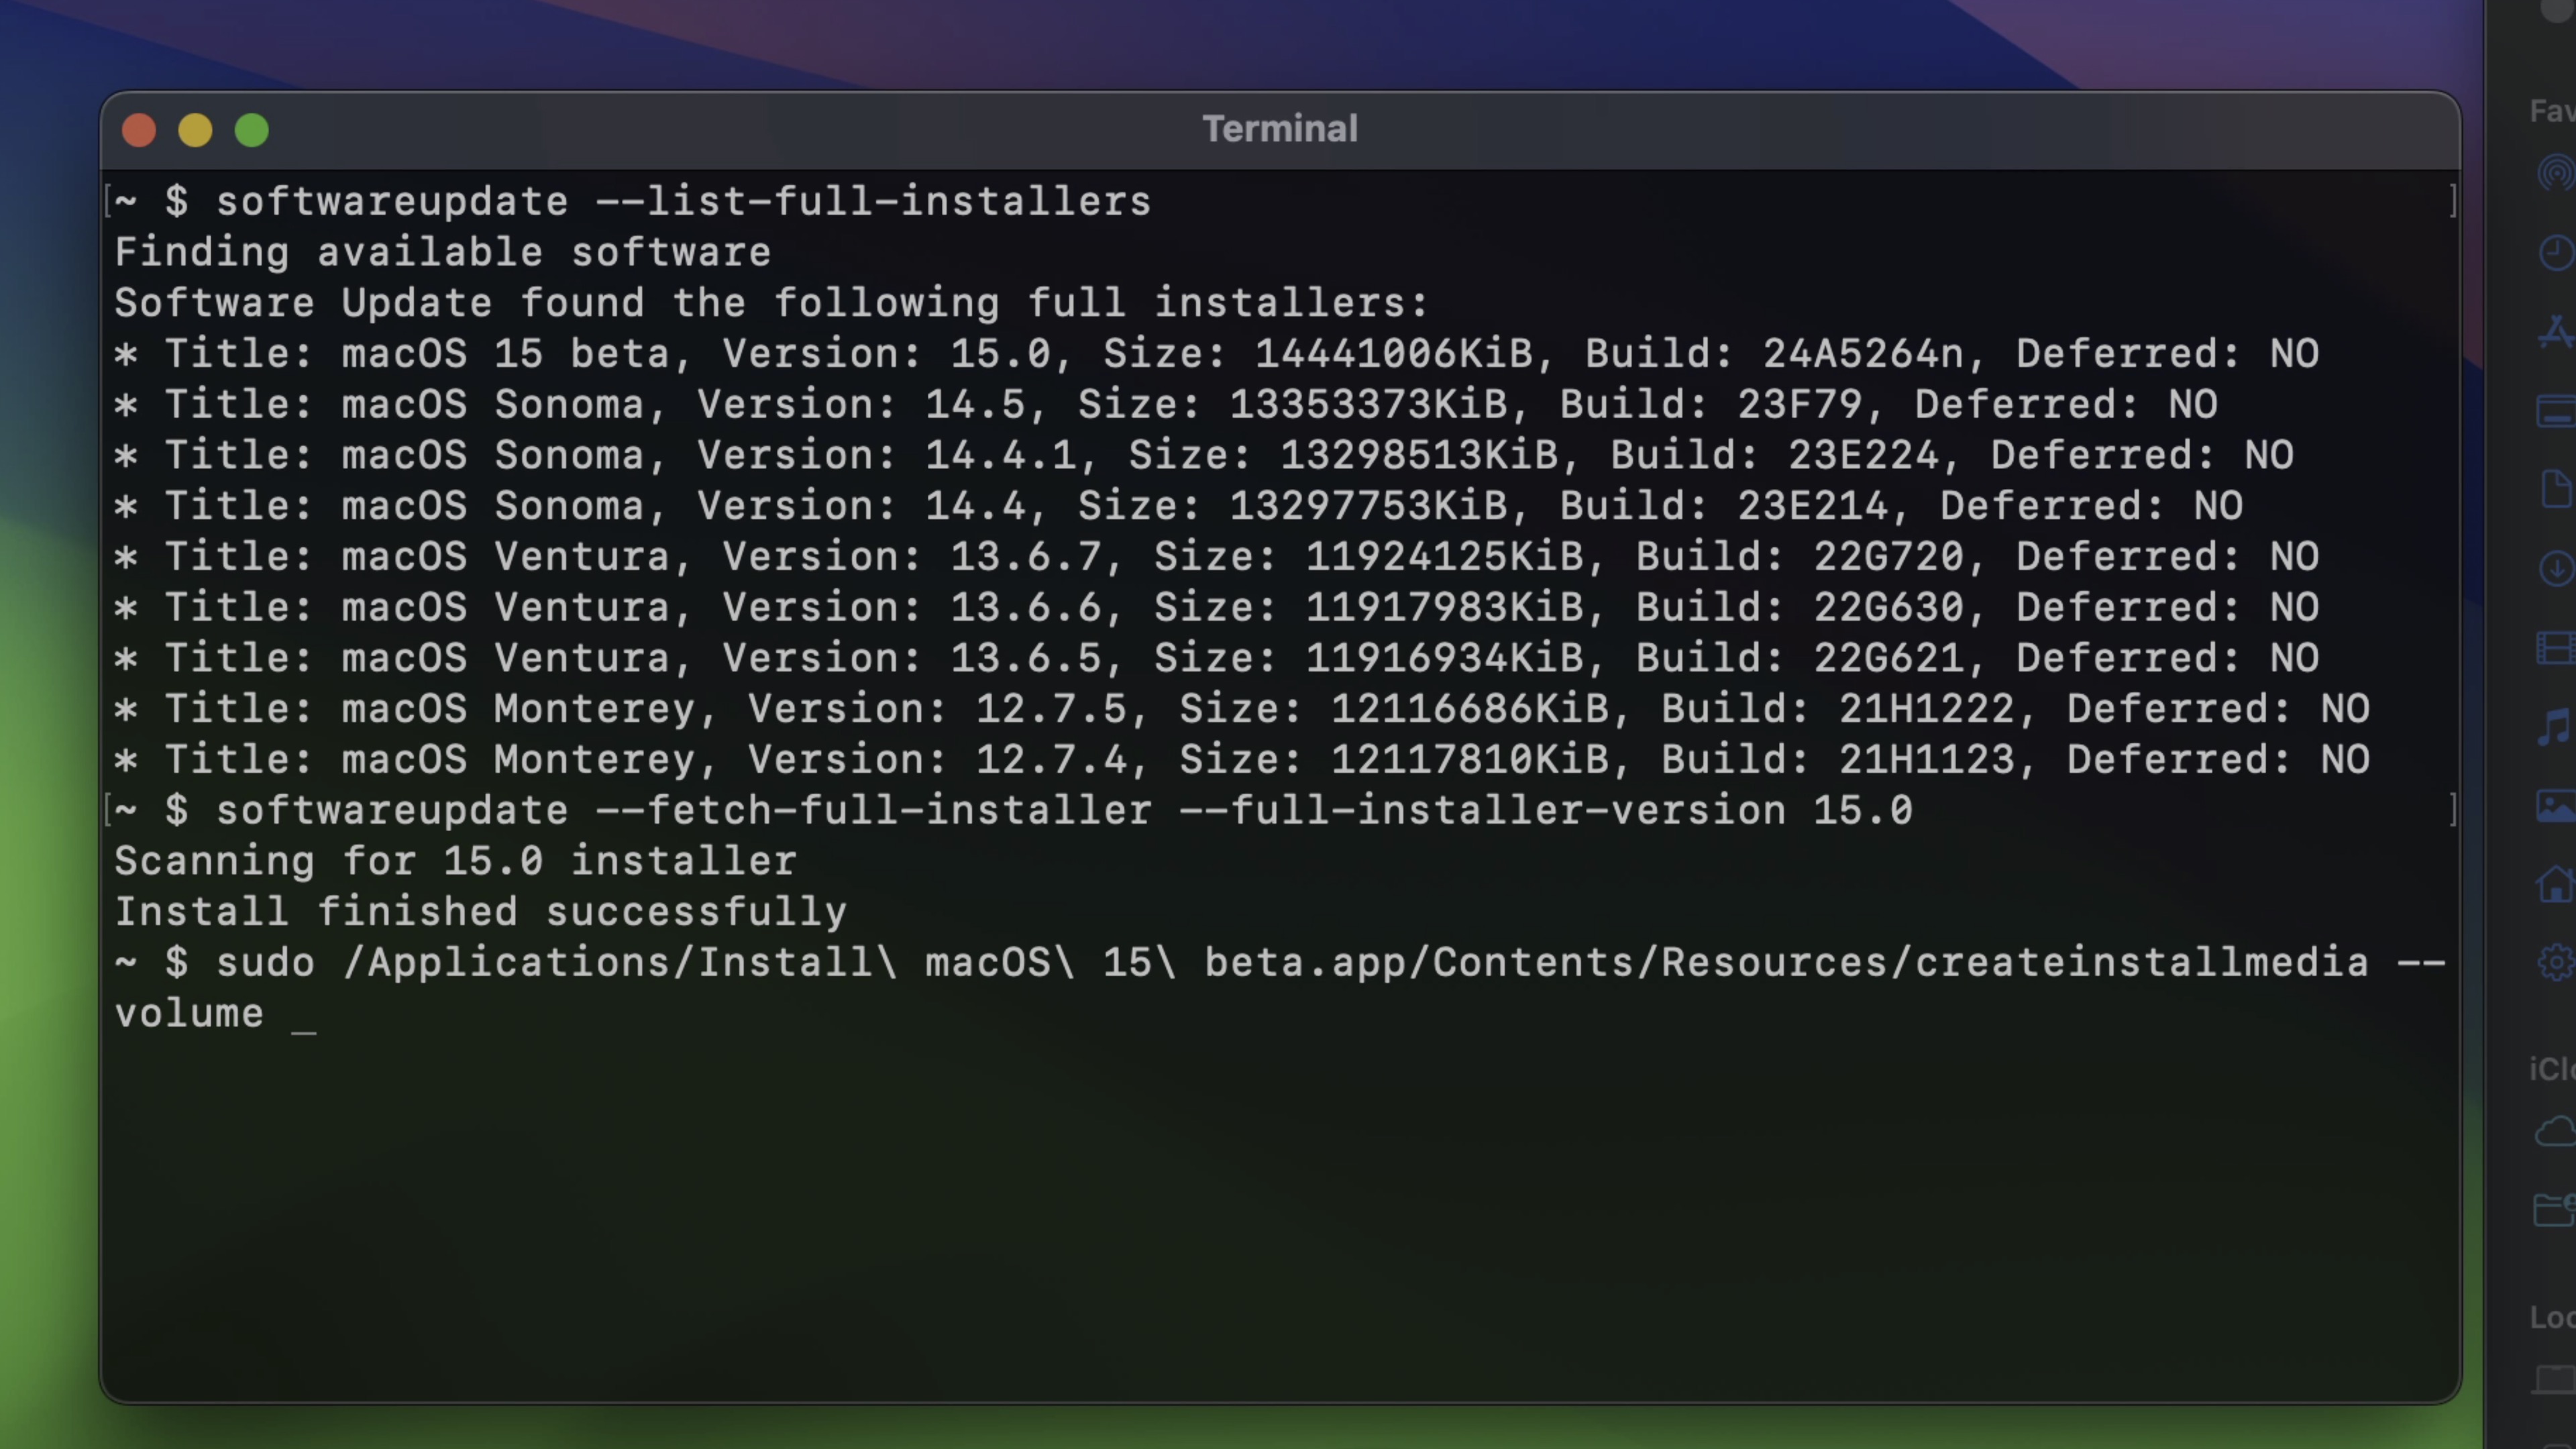
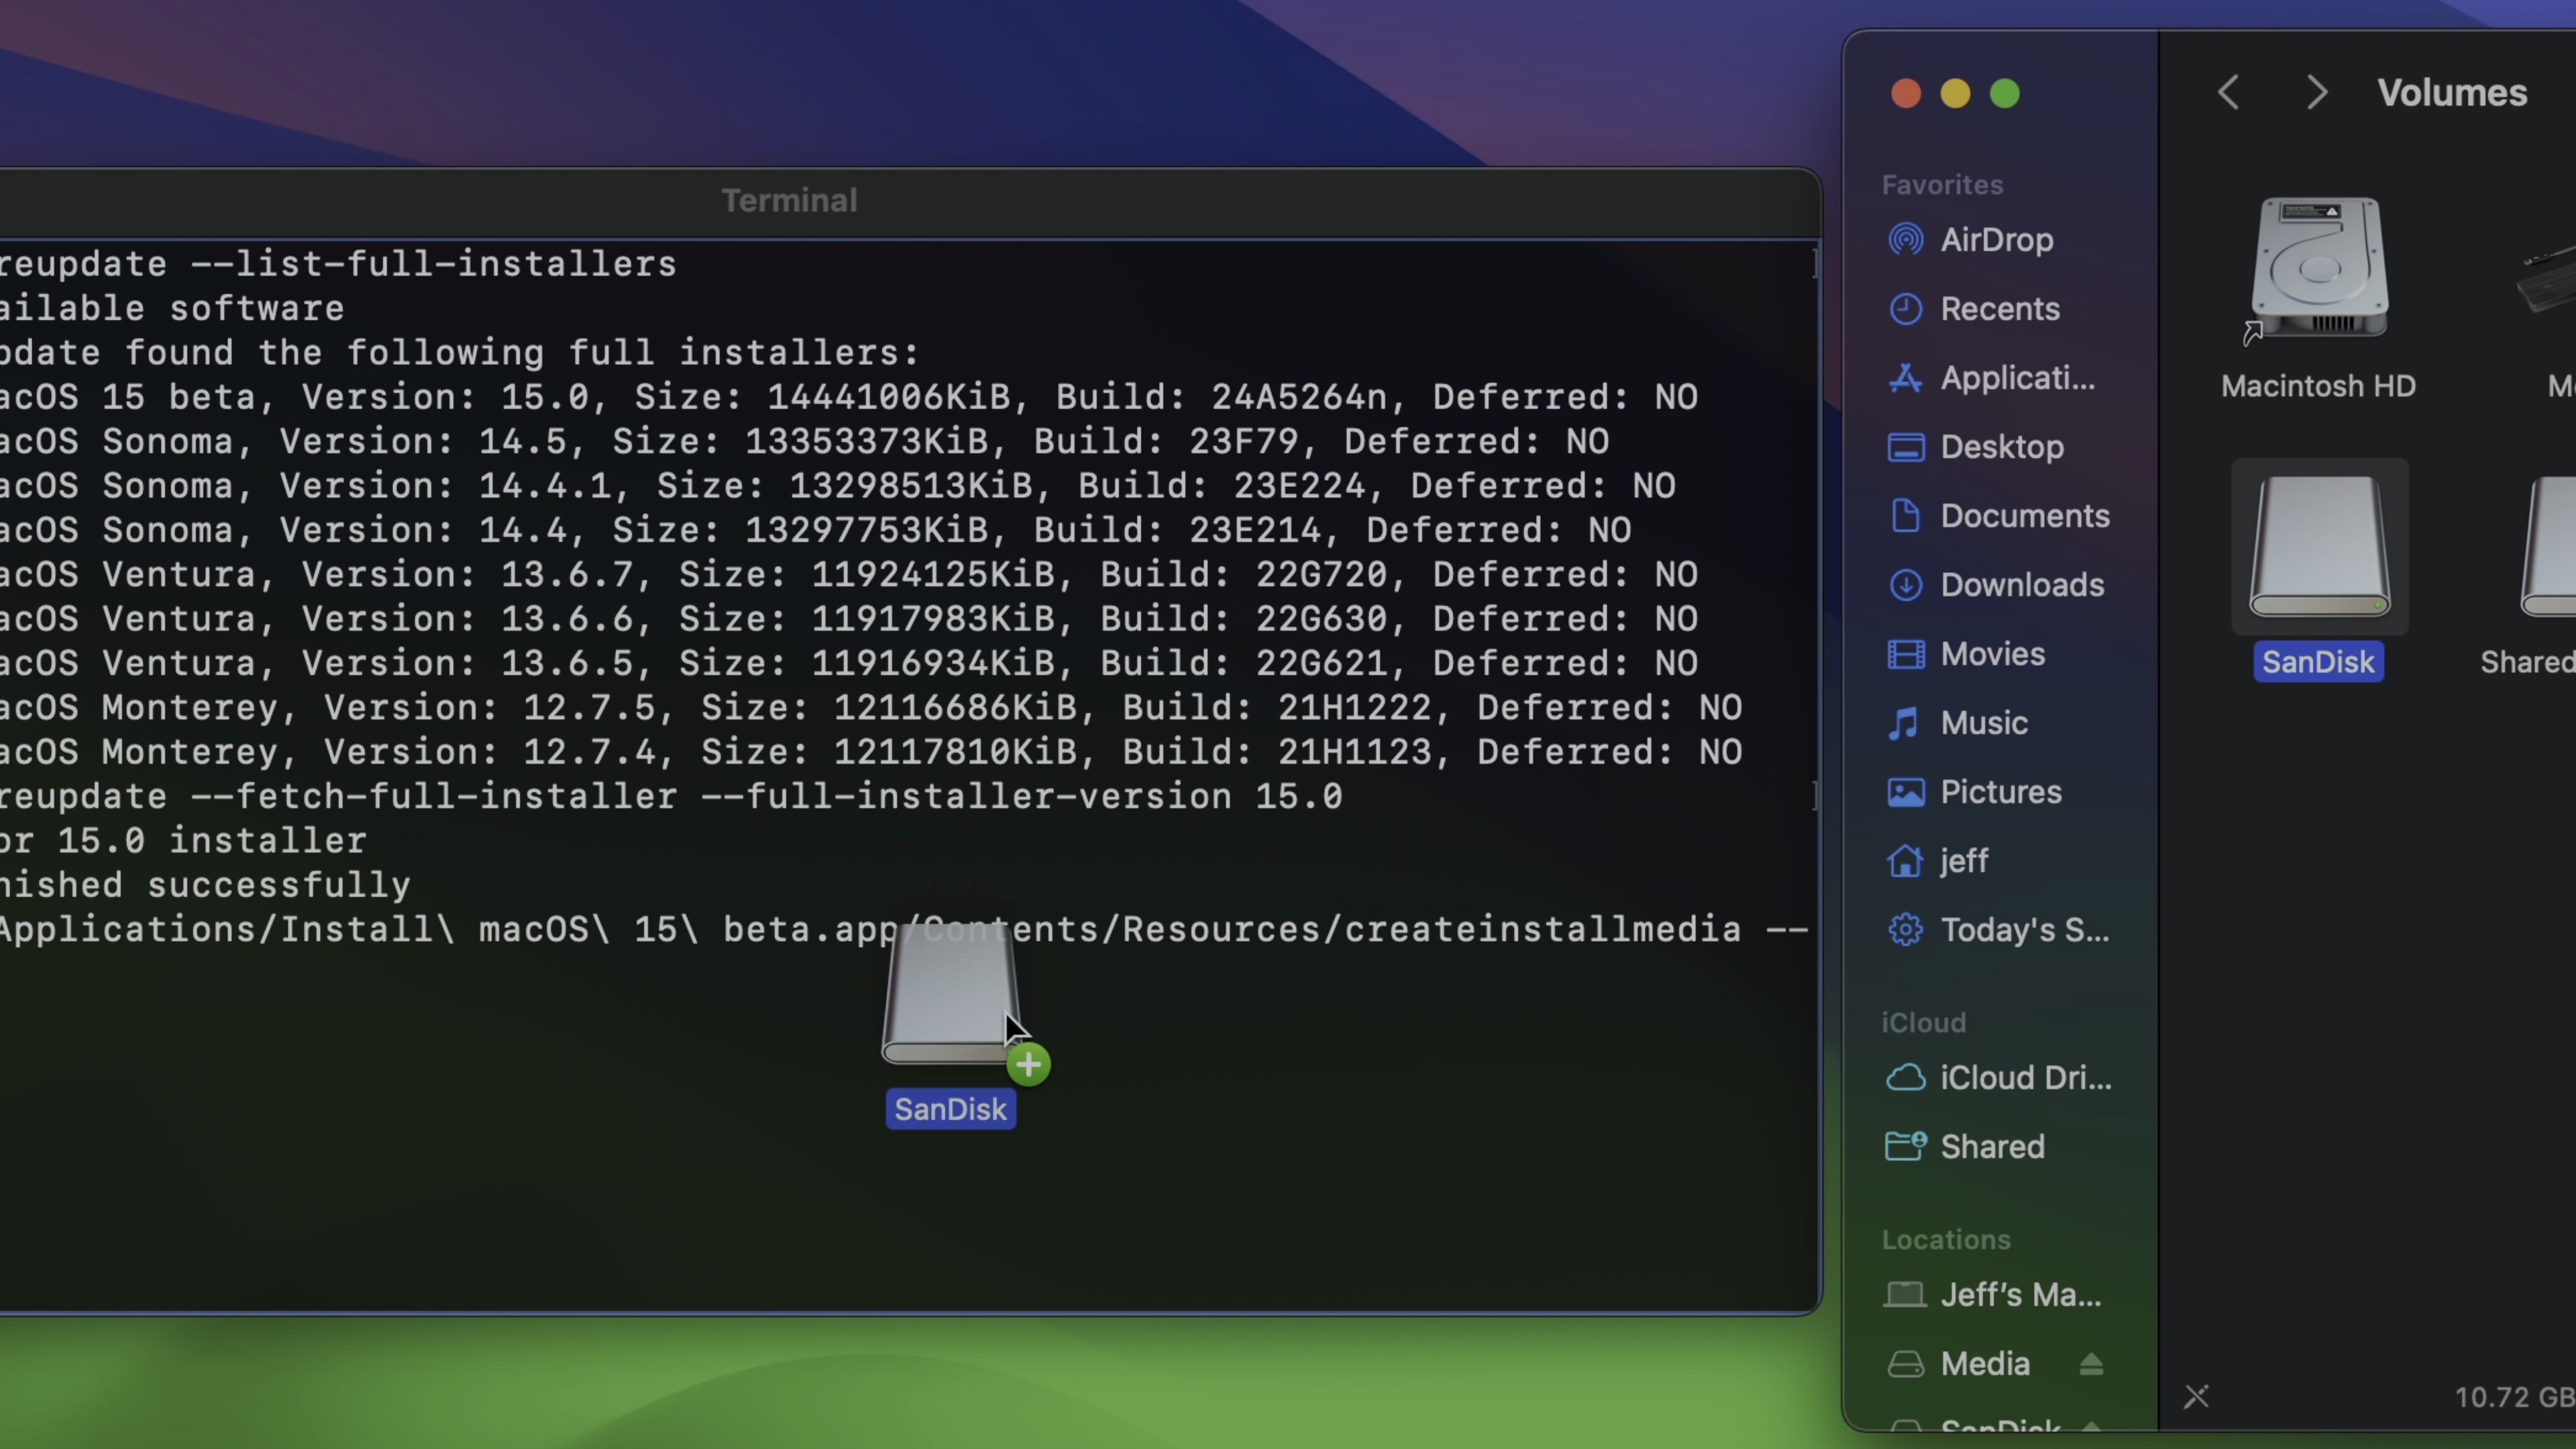
You may obtain the macOS 15 installer in numerous methods. One of many best is to make use of Terminal’s softwareupdate command, and I favor this methodology.
Step 1: Open a brand new Terminal window by navigating to Functions → Utilities → Terminal. Paste the next command in Terminal:
softwareupdate --list-full-installersPress Return in your Mac’s keyboard to determine the installer you wish to obtain. On this case, it’s macOS 15 Sequoia.
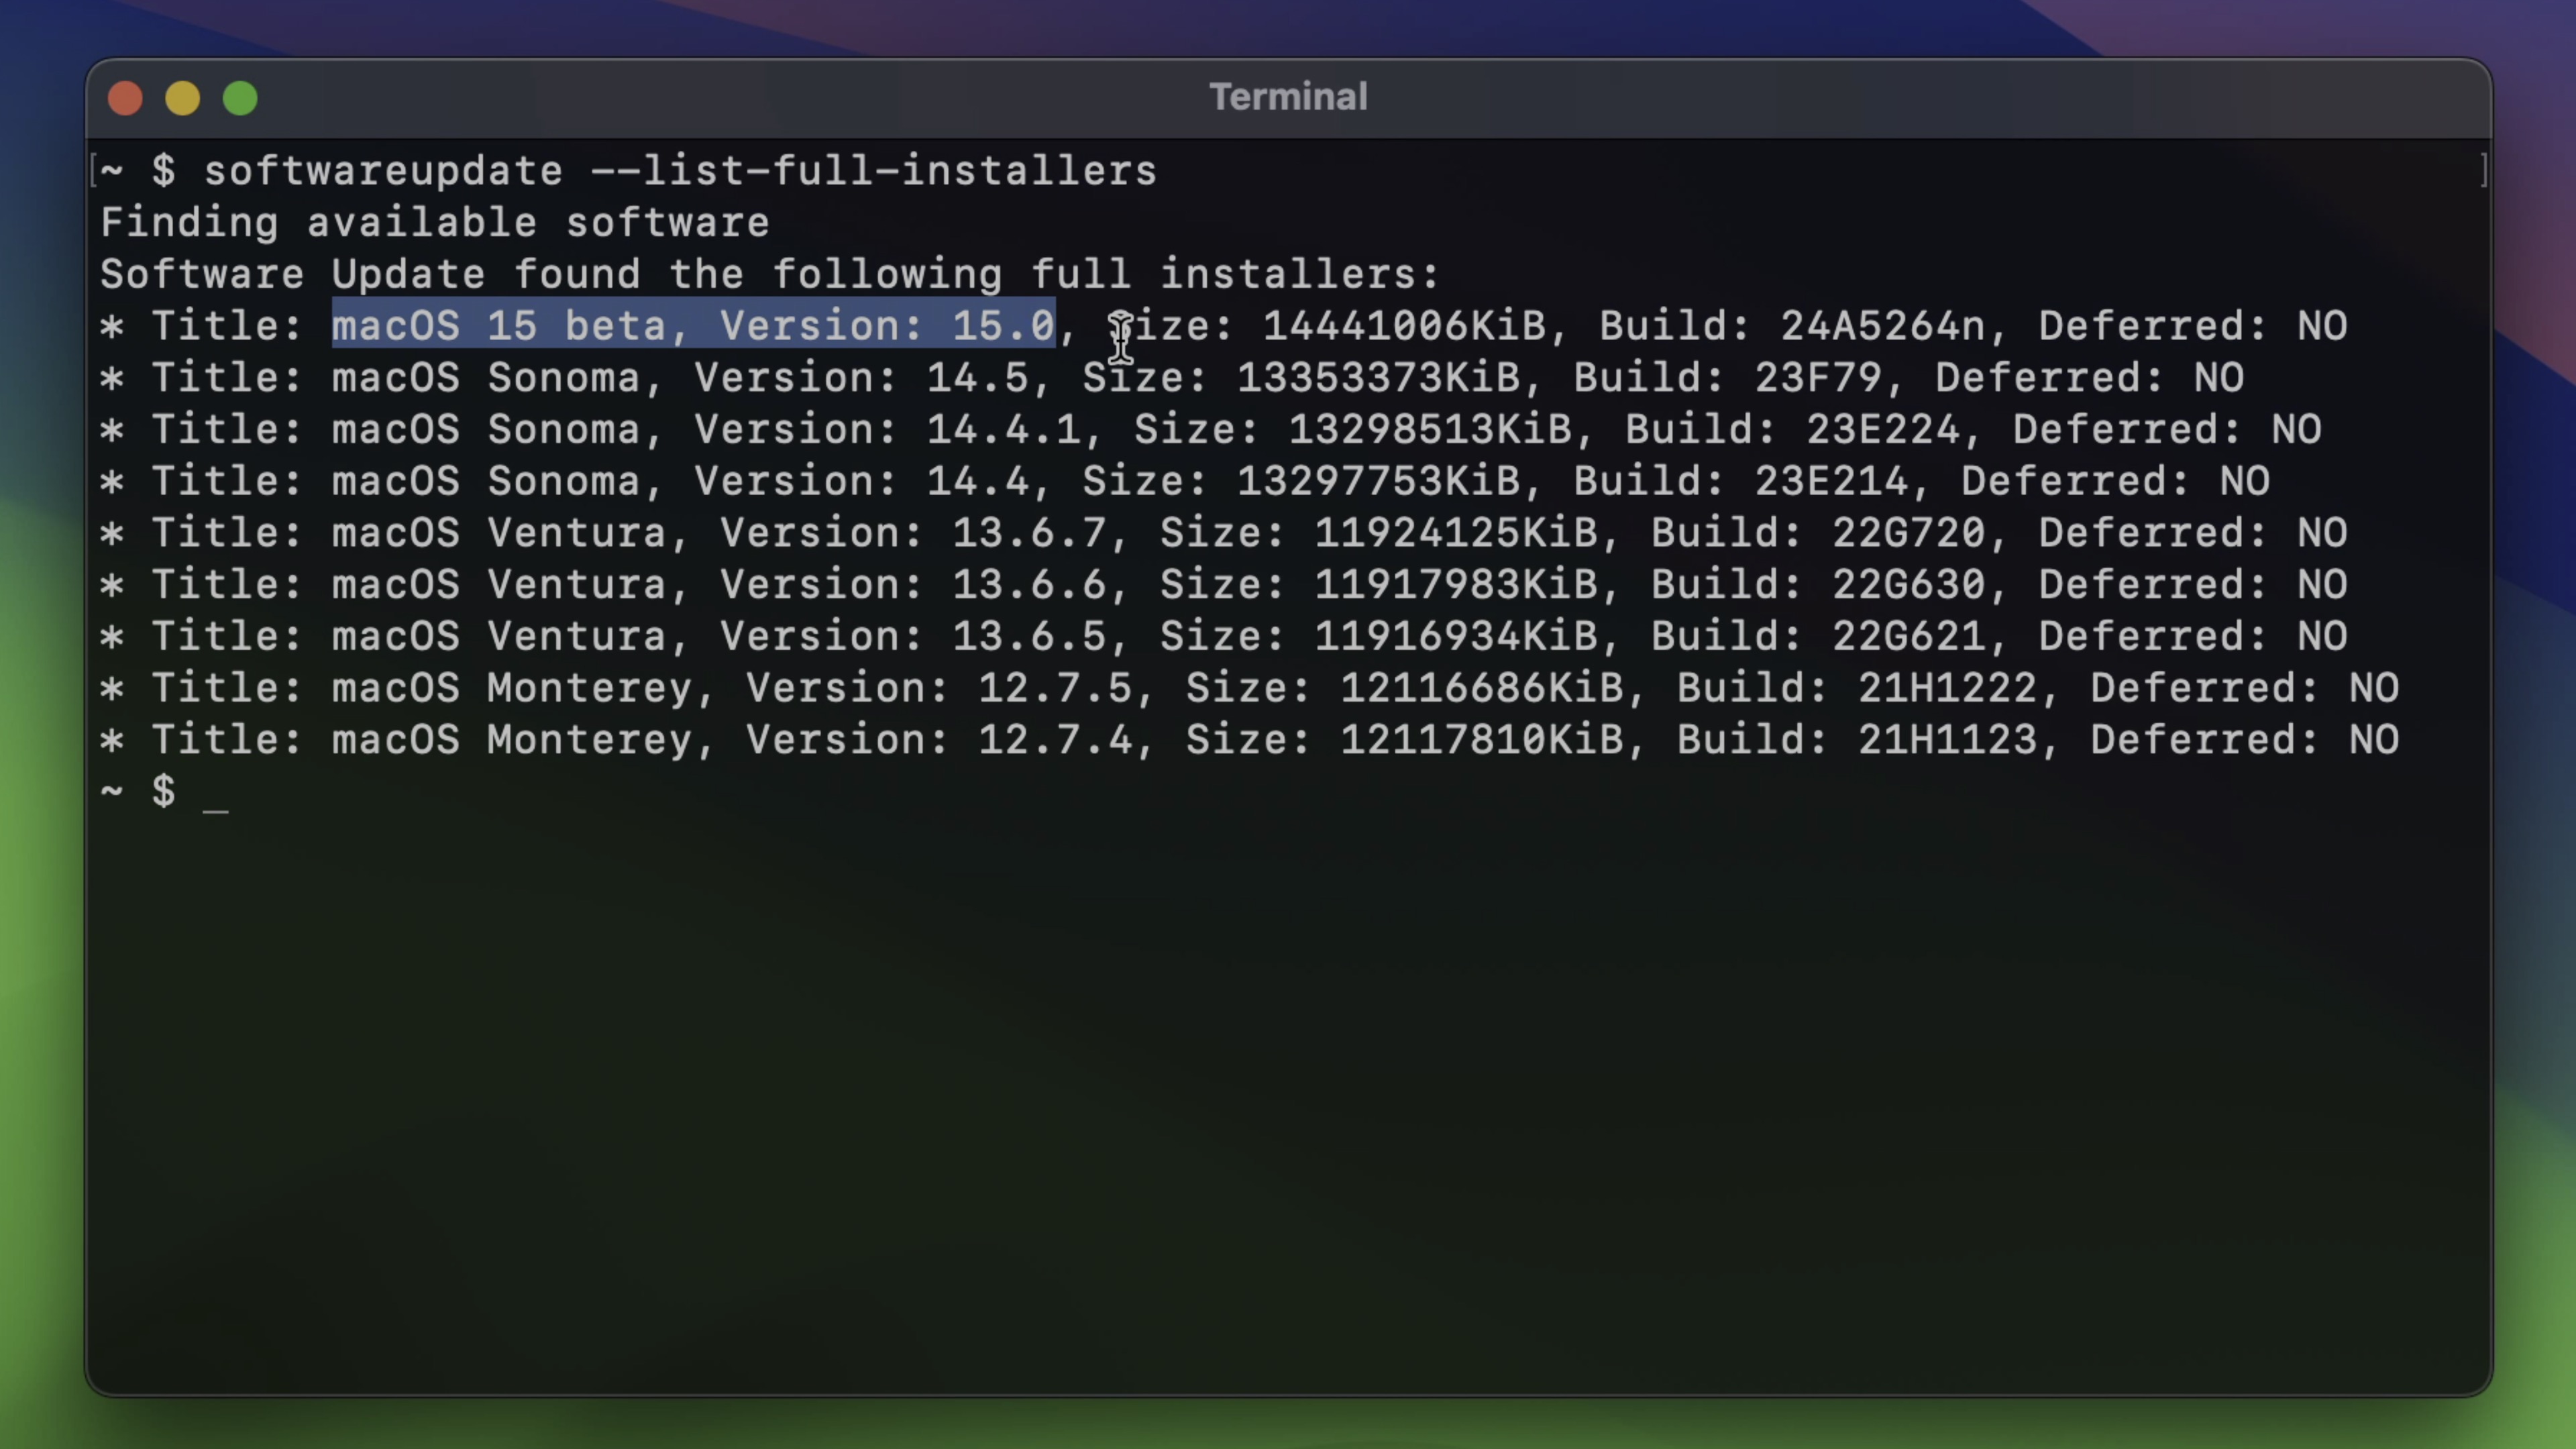
Step 2: Paste the next command in Terminal, changing the model quantity with the specified model revealed in Step 1, adopted by urgent Return in your Mac’s keyboard. This may provoke the obtain of the macOS installer to your Functions folder.
softwareupdate --fetch-full-installer --full-installer-version 15.0
Create the macOS Sequoia USB installer
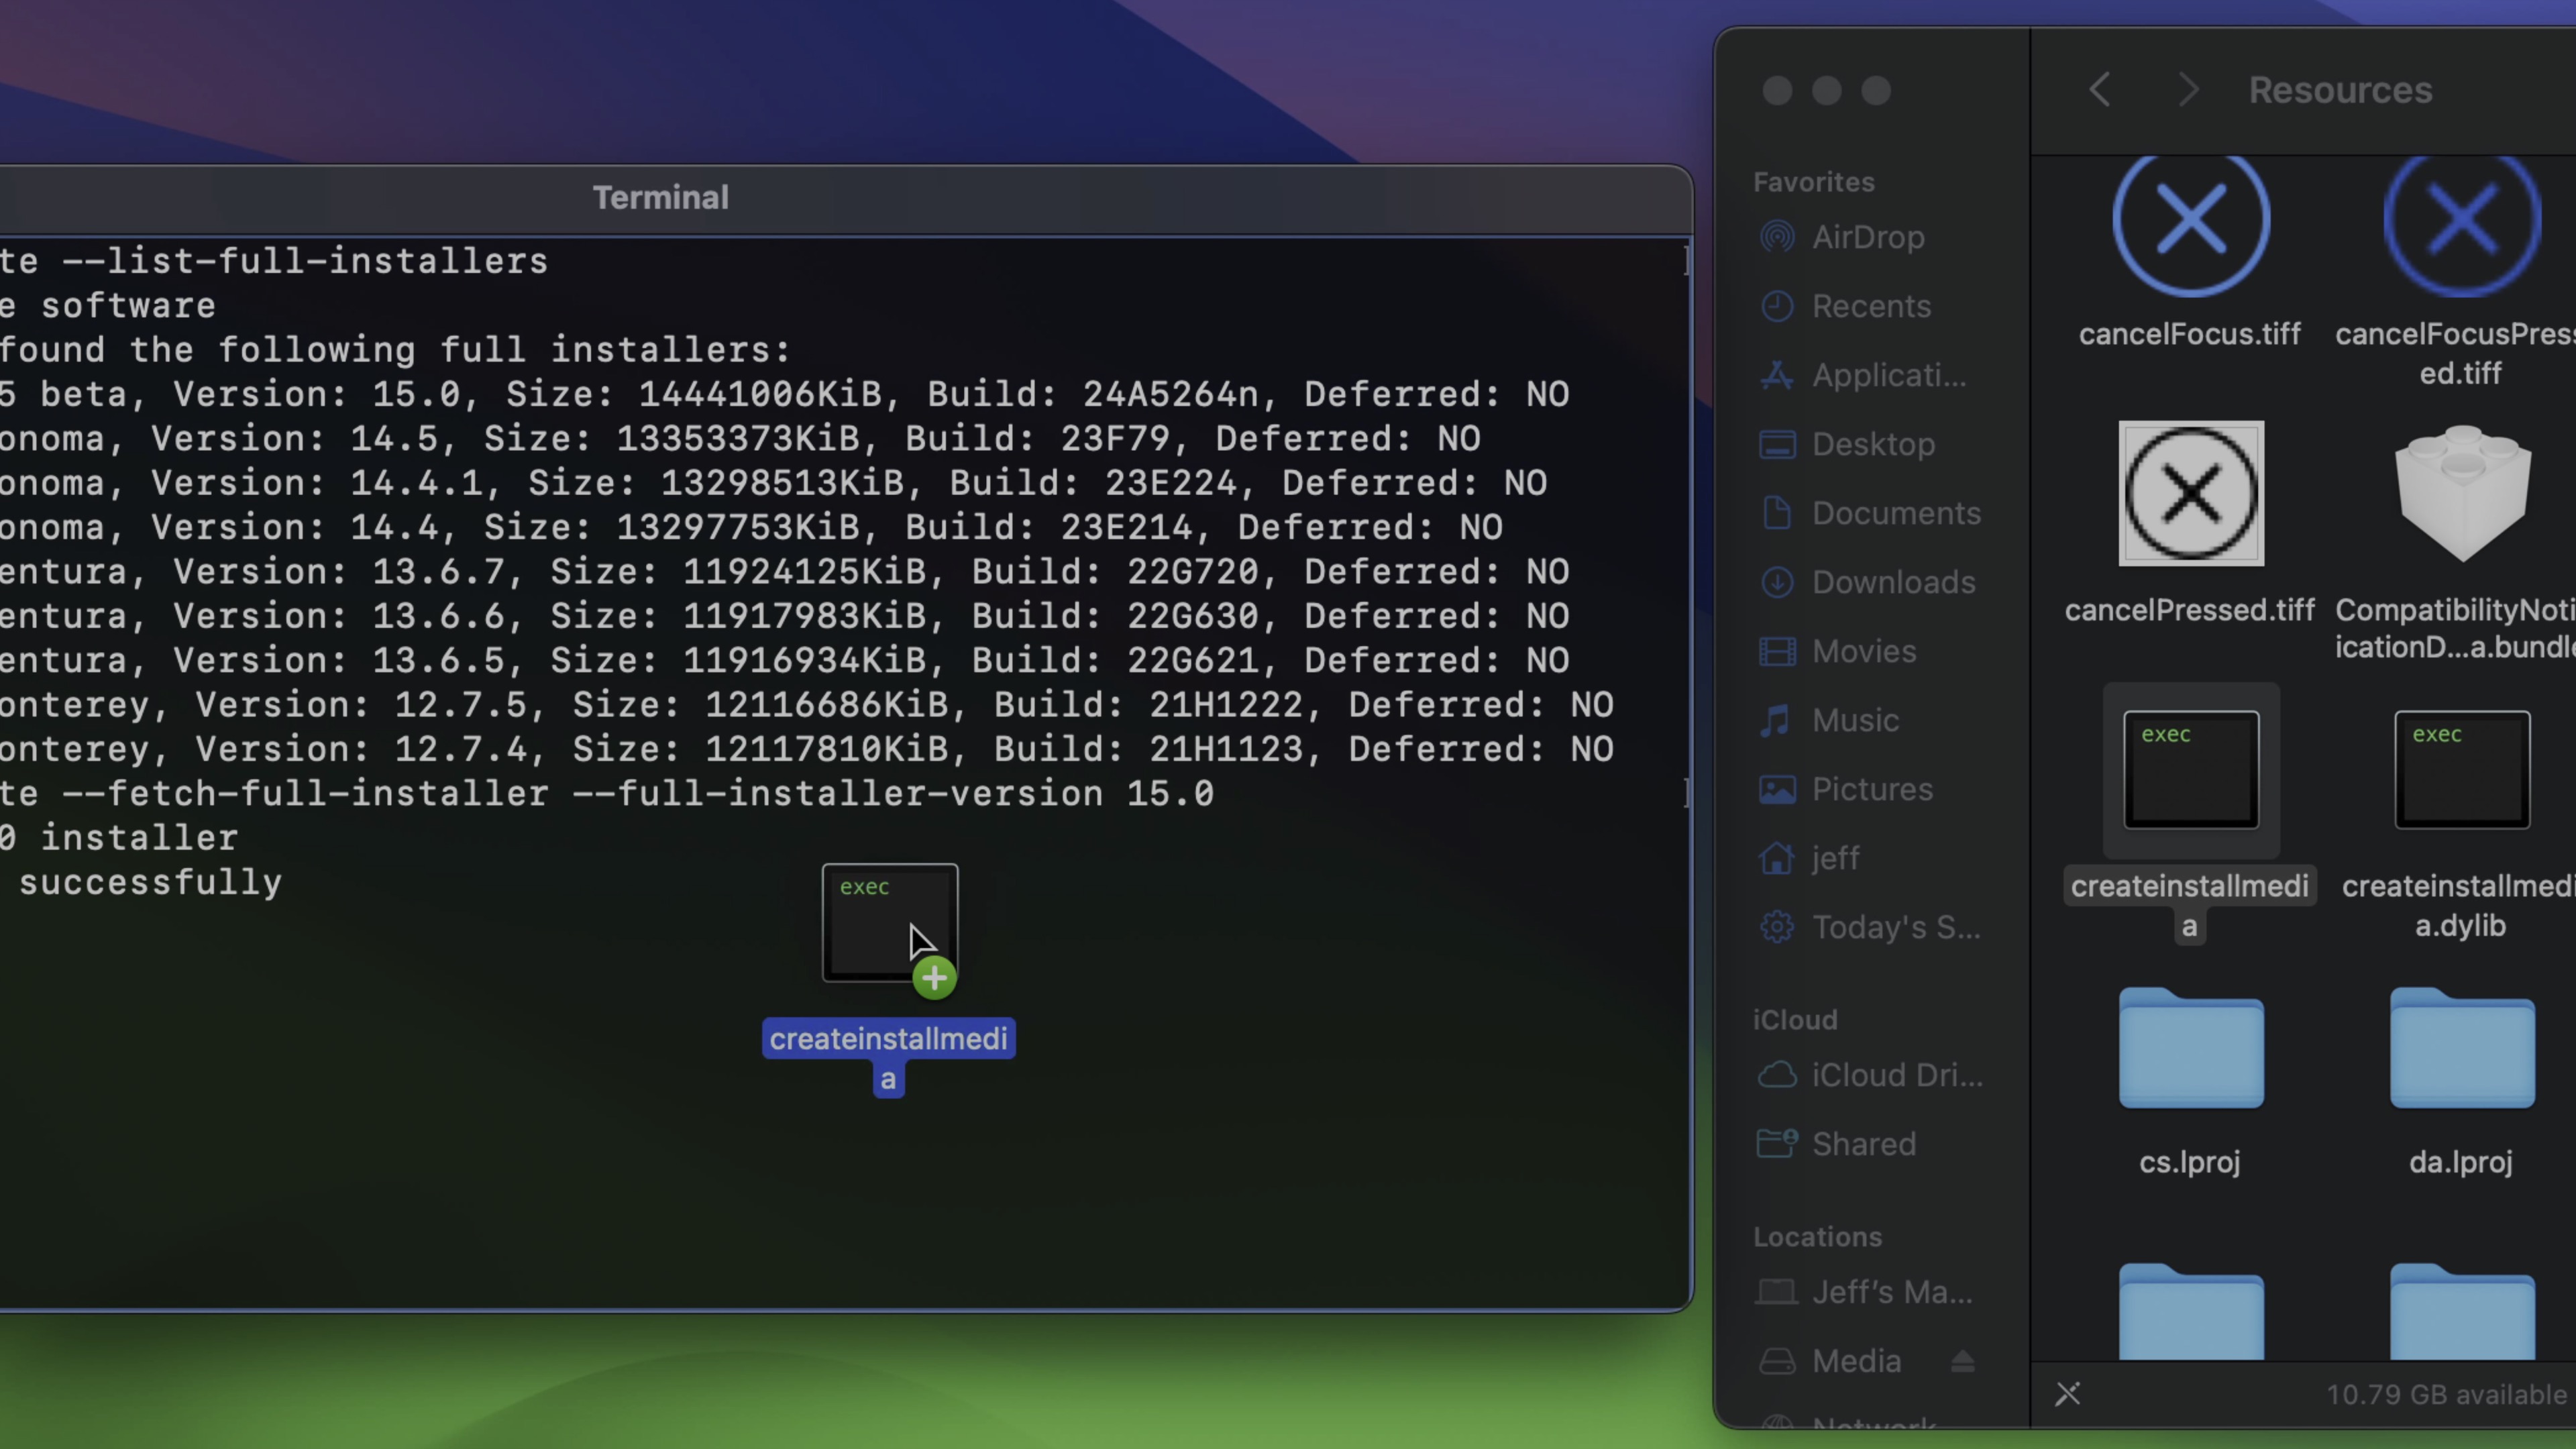
Step 3: Open Finder → Functions, then right-click on Set up macOS 15 beta → Present Bundle Contents. Open Contents → Sources.
Step 4: In a brand new or current Terminal window, sort sudo adopted by an area.
Step 5: Drag and drop createinstallmedia from the Sources folder on to the Terminal window.
Step 6: Sort --volume adopted by an area.
Step 7: Join your USB Drive, open the drive in Finder, and guarantee that nothing on it’s wanted. If there may be, it’s necessary to again up any knowledge that you just want, as the next steps will delete the contents of the drive.
Word: APFS-formatted drives can’t be used to create USB installers. In case your USB Drive is APFS formatted, you’ll have to open Functions → Utilities → Disk Utility, choose the drive, and click on Erase. For format, make sure you select Mac OS Prolonged (Journaled) and click on Erase.
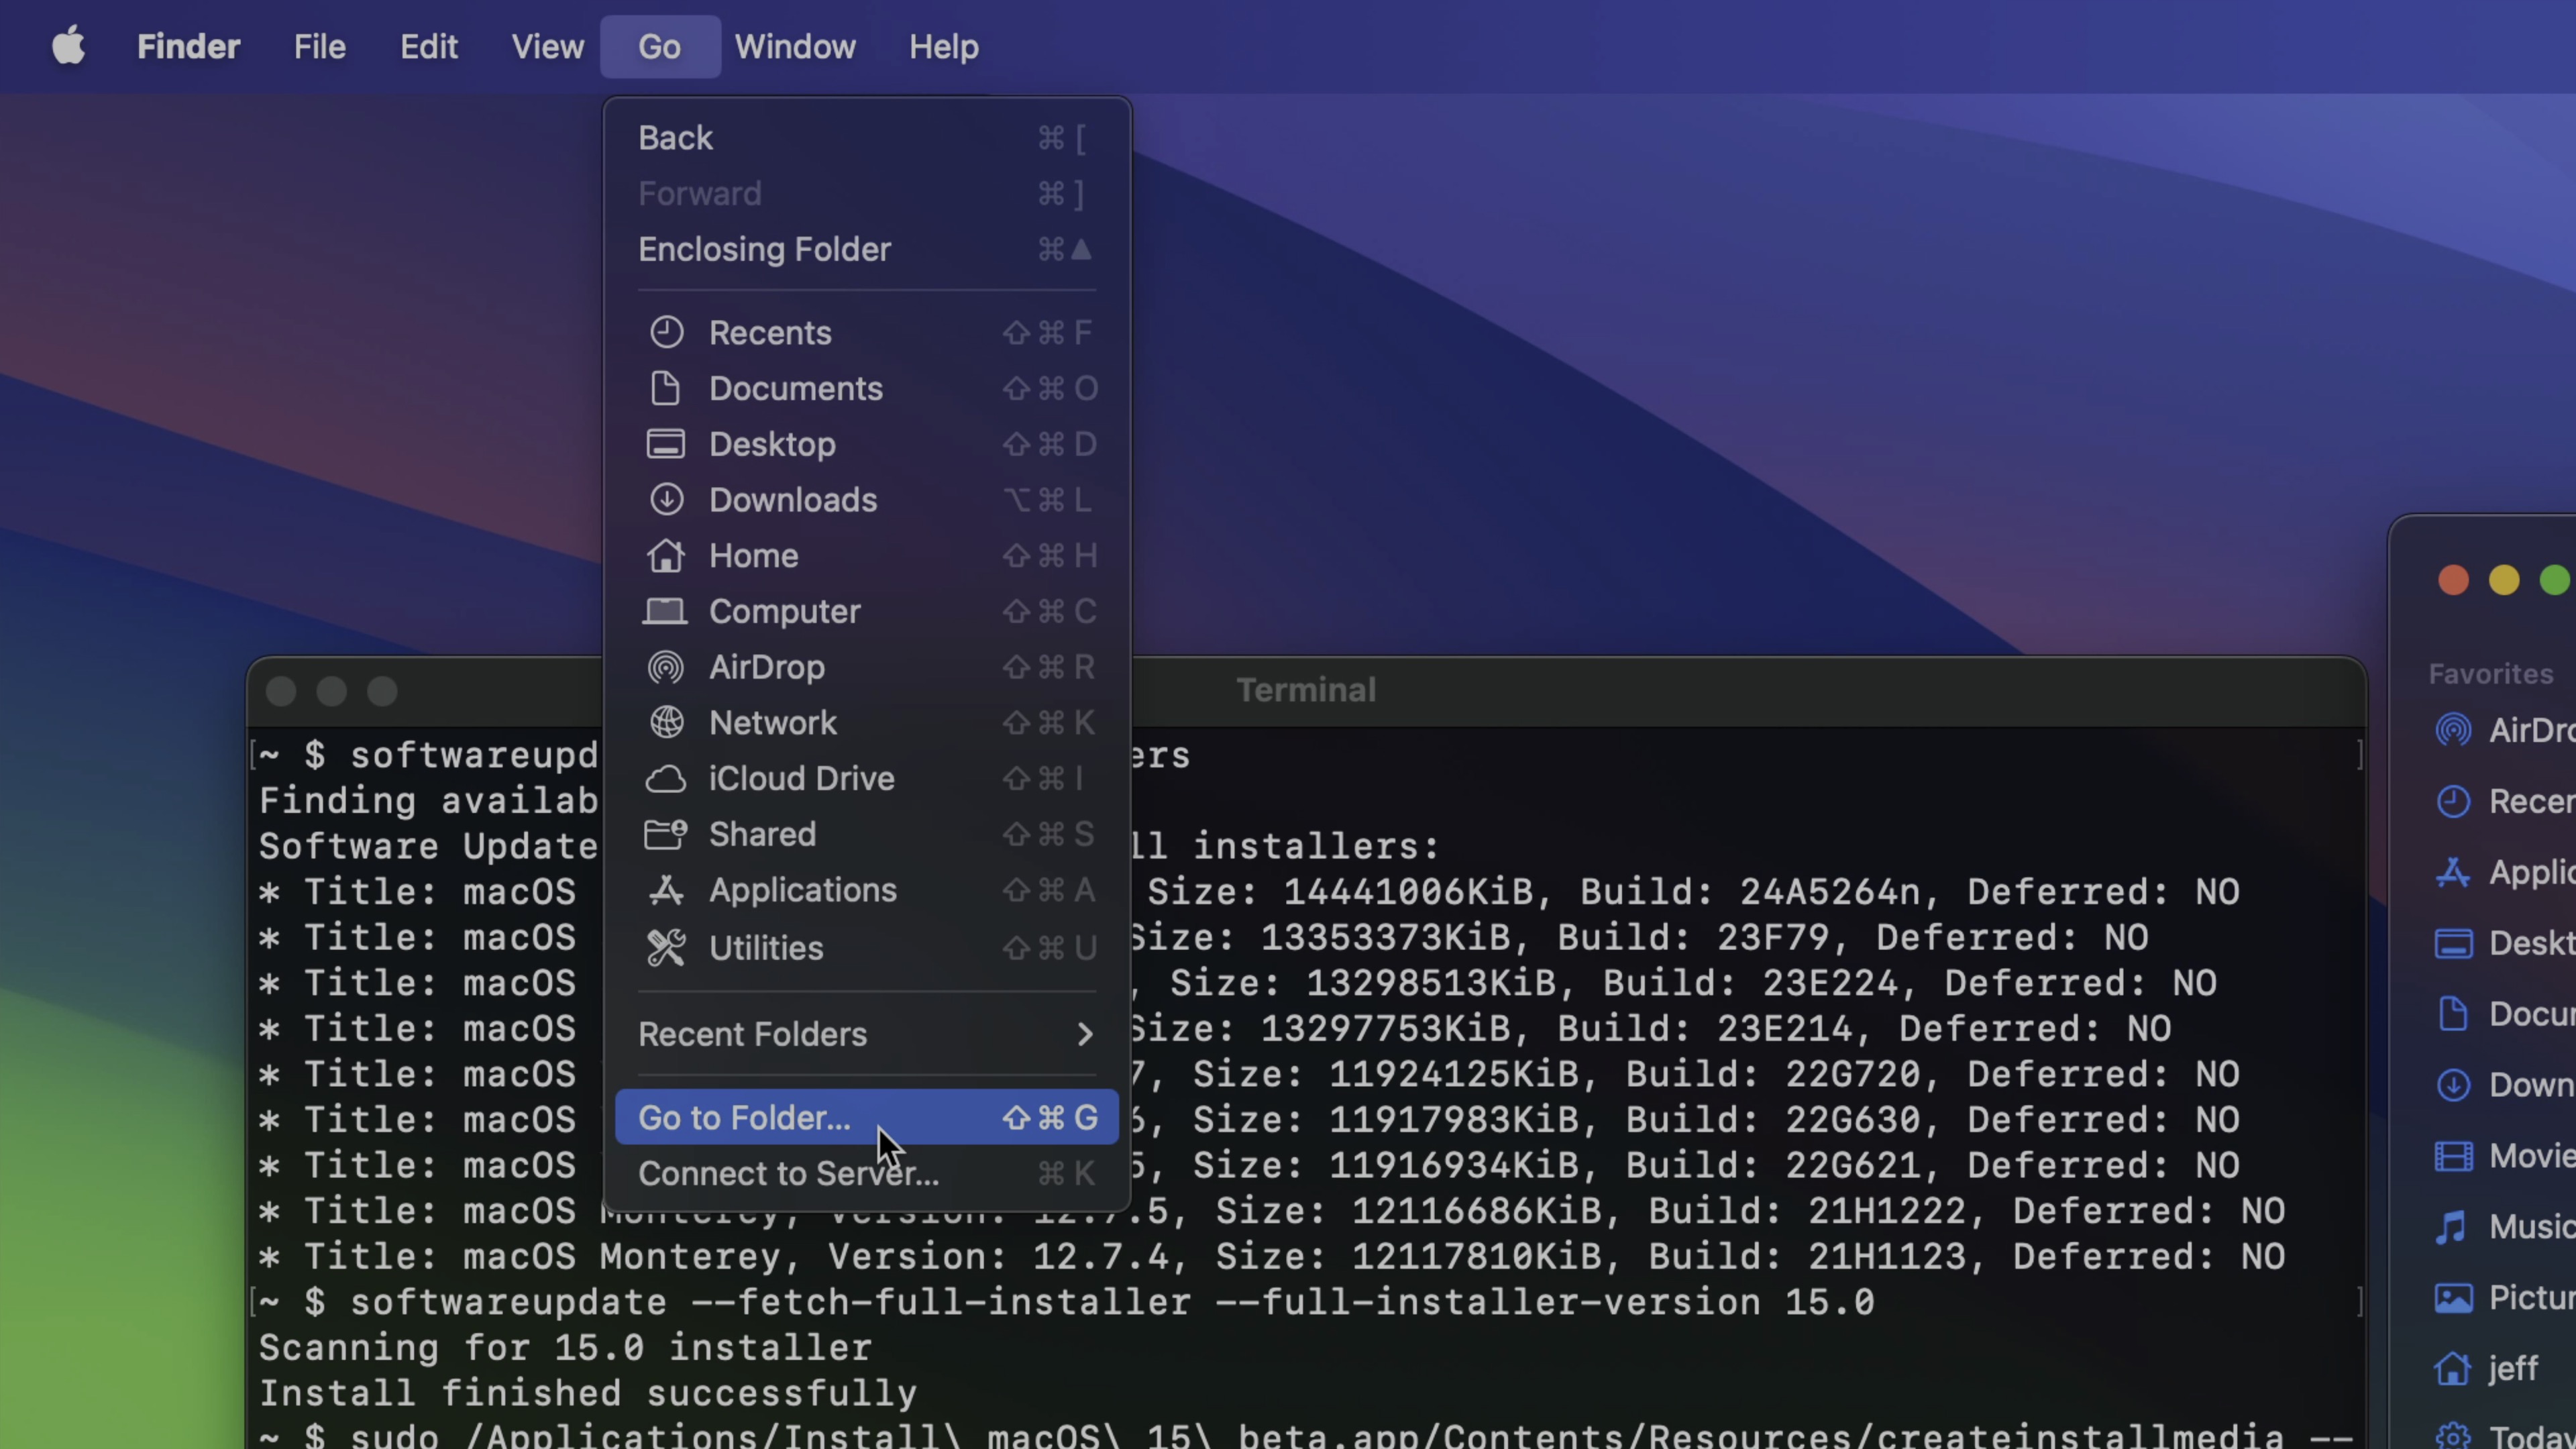
Step 8: Open Finder → Go → Go To Folder…
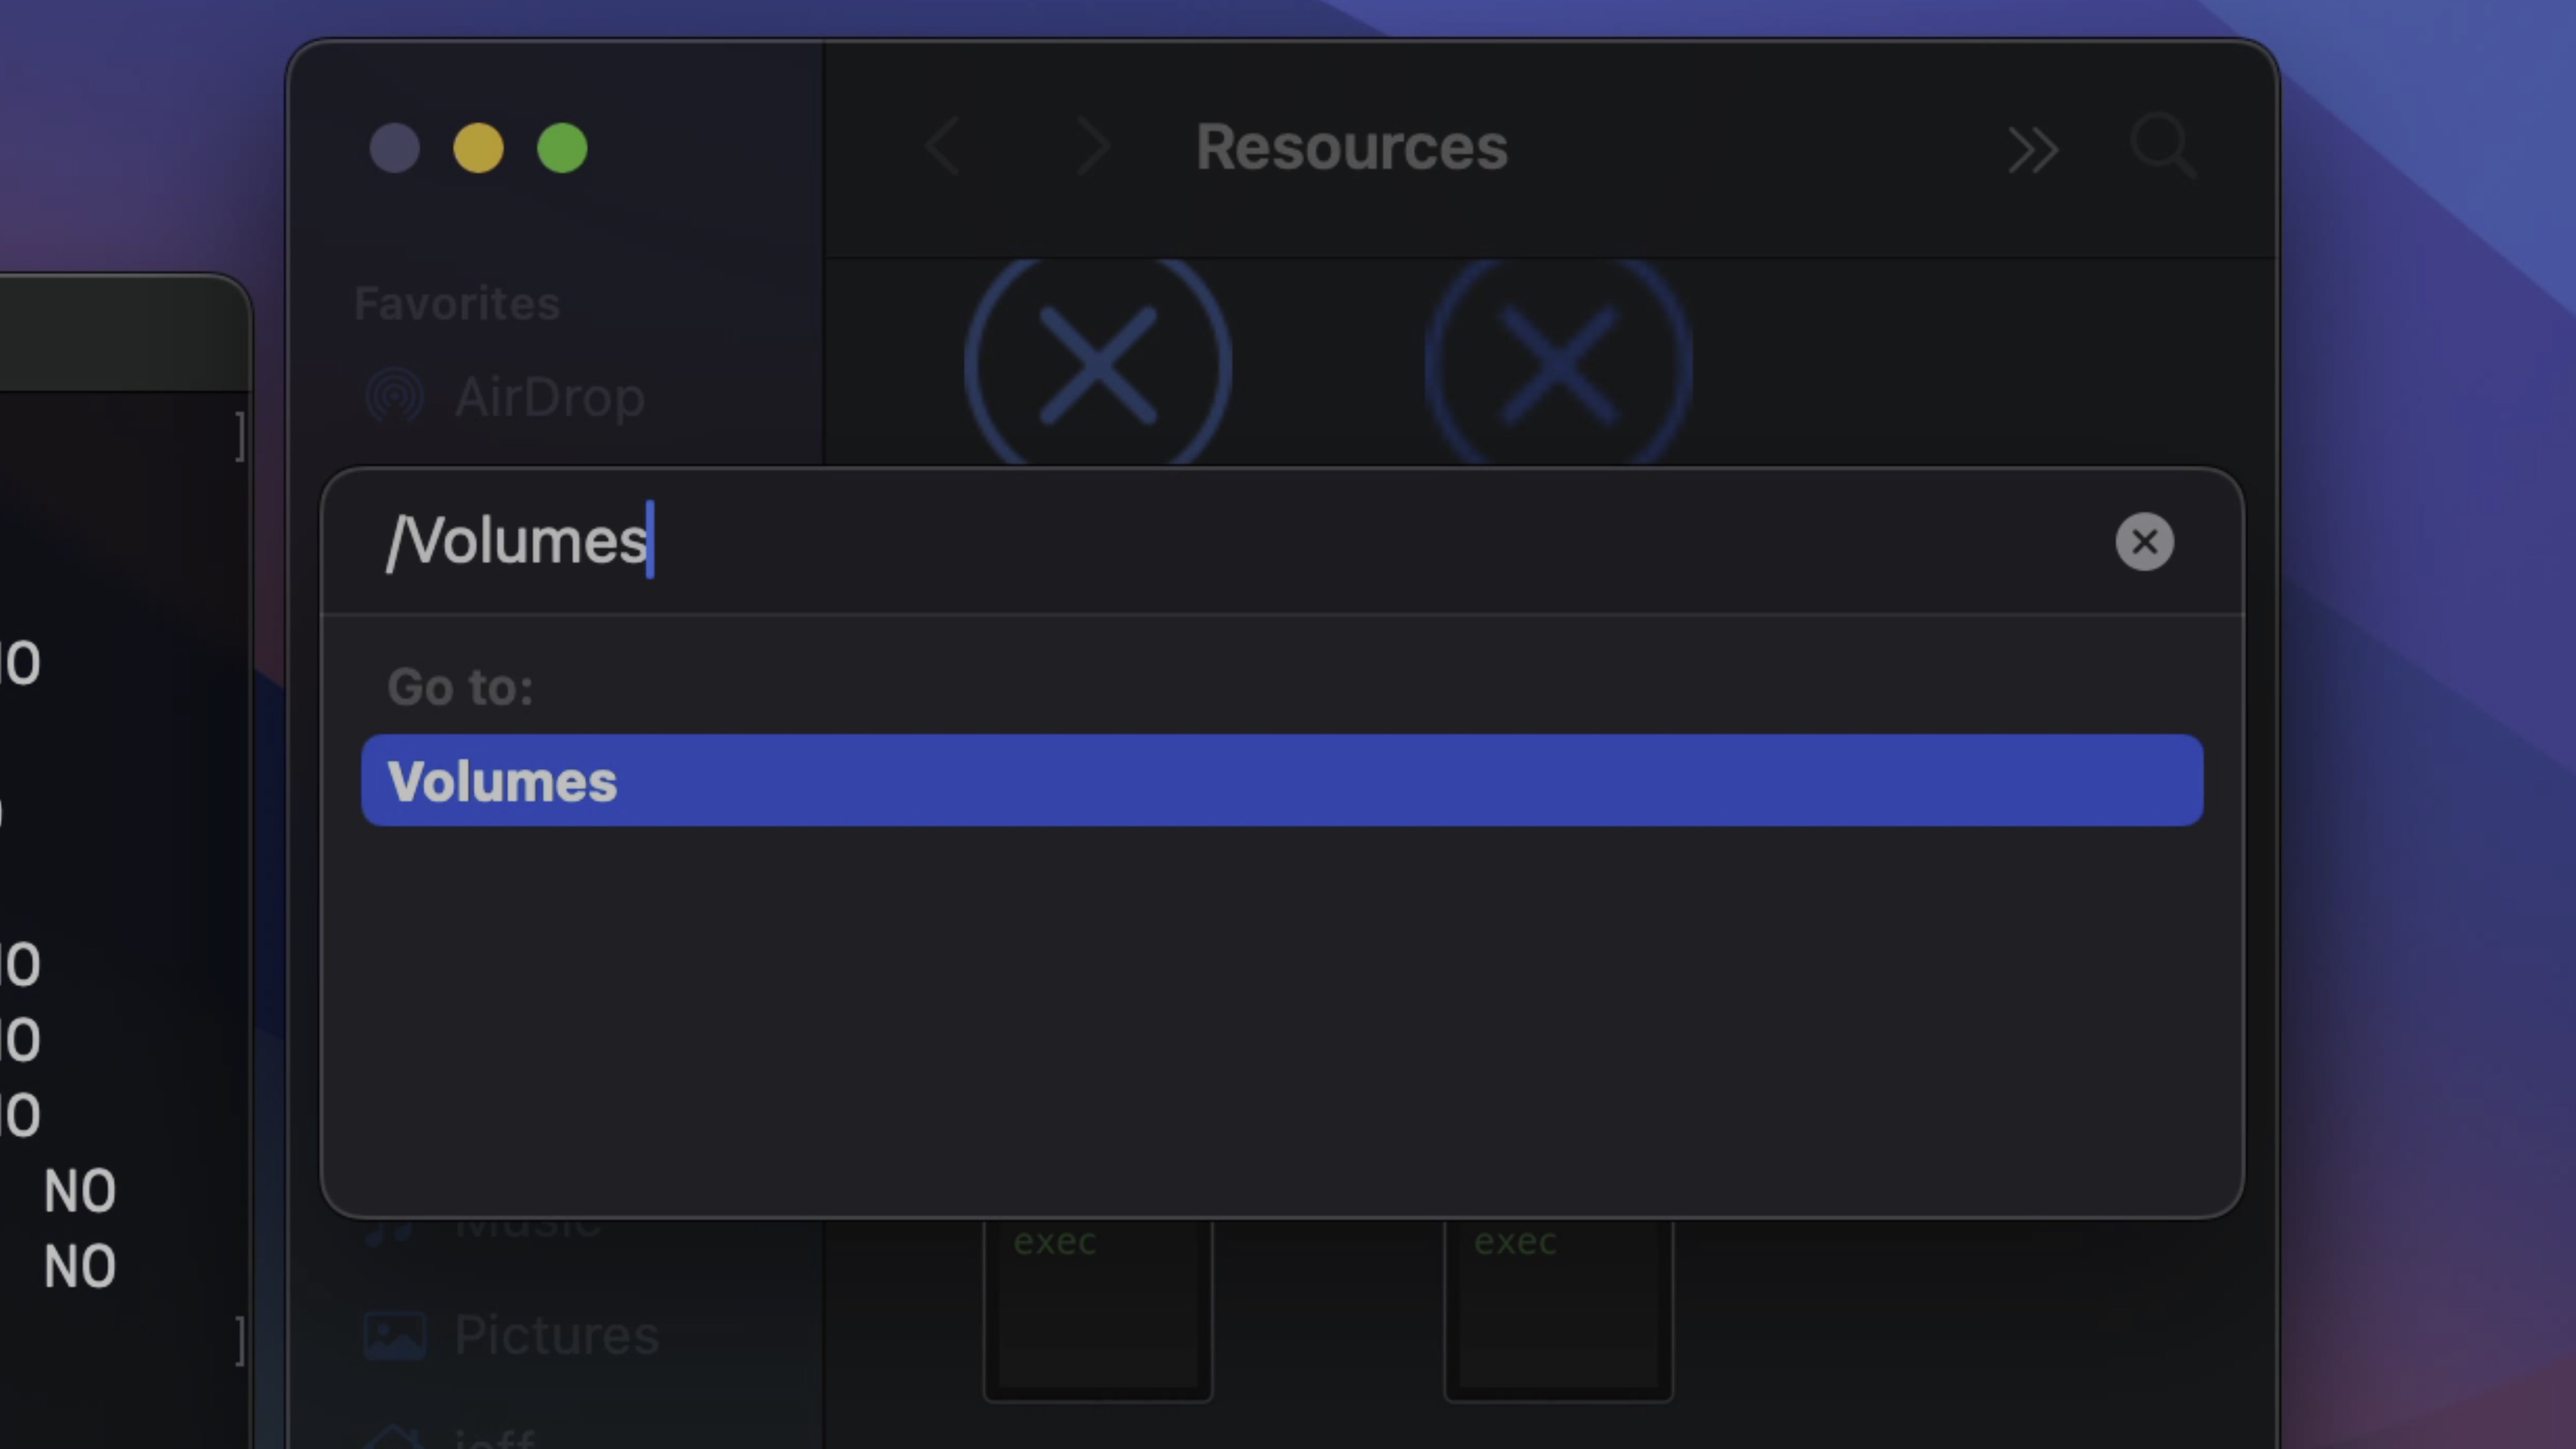
Step 9: Sort /Volumes and press return in your keyboard to discover all linked volumes.
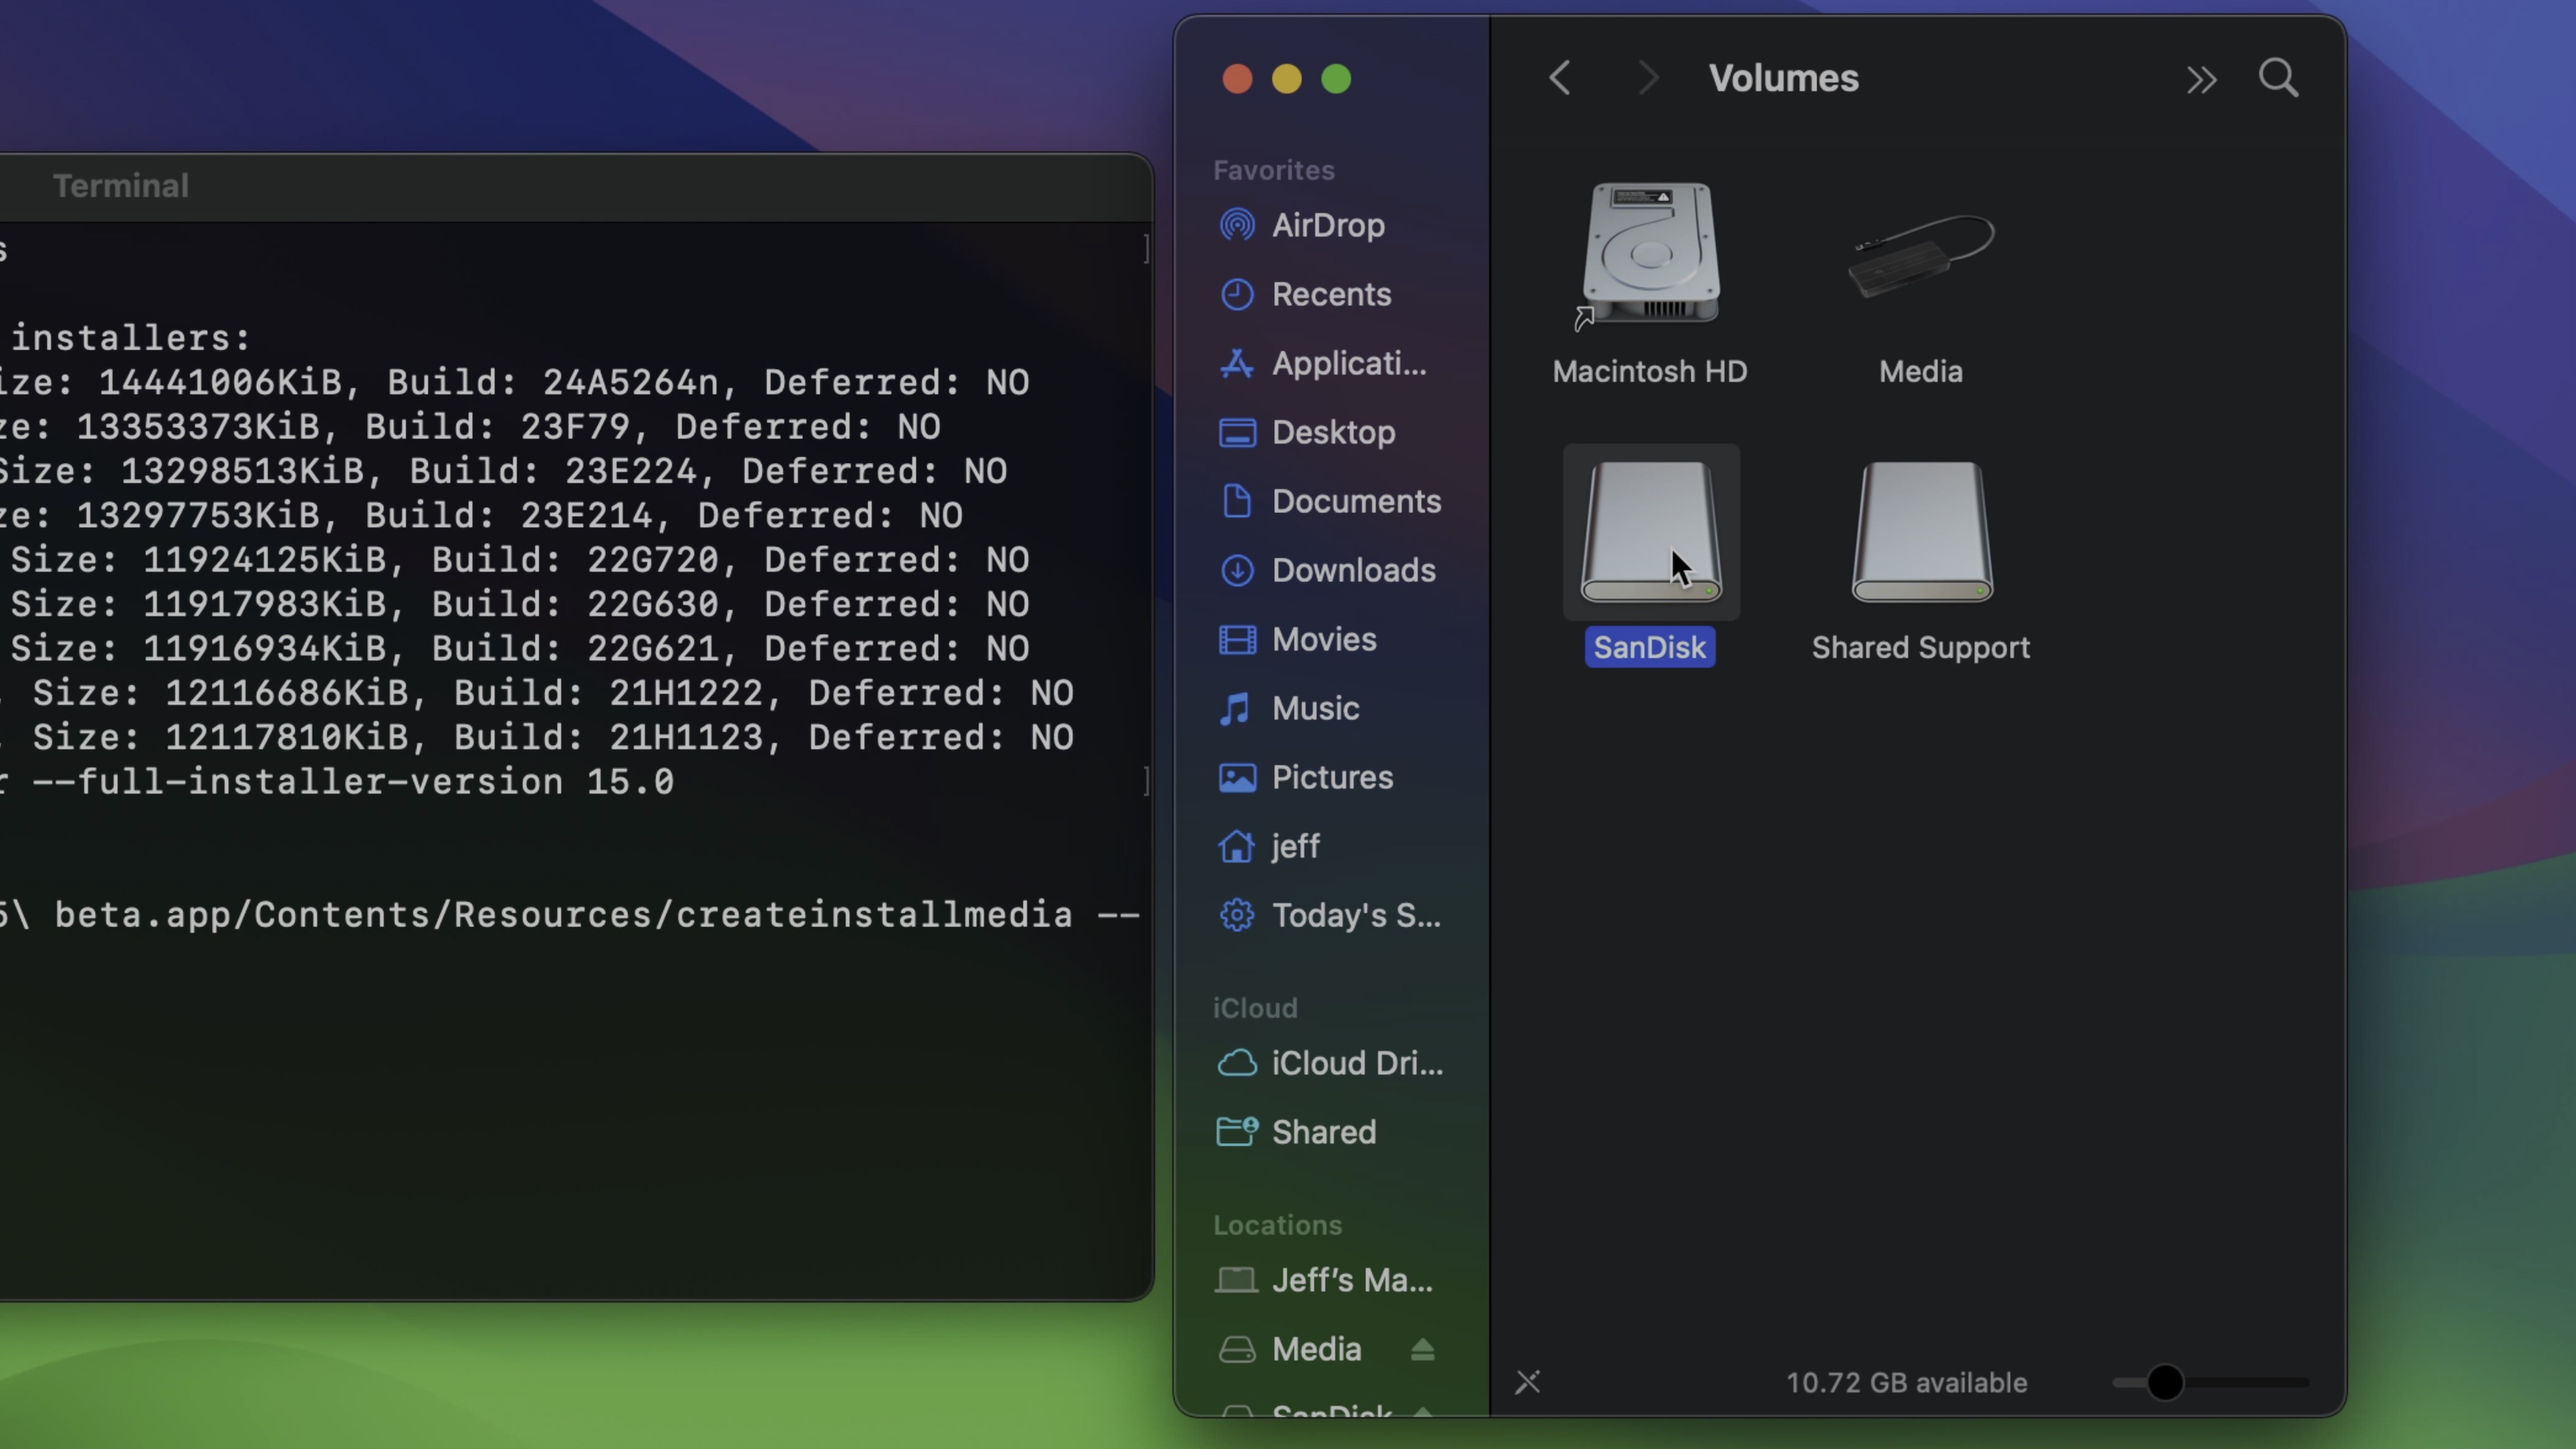
Step 10: Determine and drag and drop the USB flash drive quantity to the Terminal window.
Warning: Guarantee you choose the right USB drive, otherwise you danger deleting the contents of the unsuitable drive.
Step 11: Press Return in your Mac’s keyboard to course of the complete Terminal command and enter your administrator password when requested.
Step 12: When prompted, sort a “y,” and press Return in your Mac’s keyboard.
Word: In case you haven’t already supplied permission, Terminal might ask for entry to recordsdata on the detachable quantity (USB drive). If that’s the case, click on OK to permit entry.
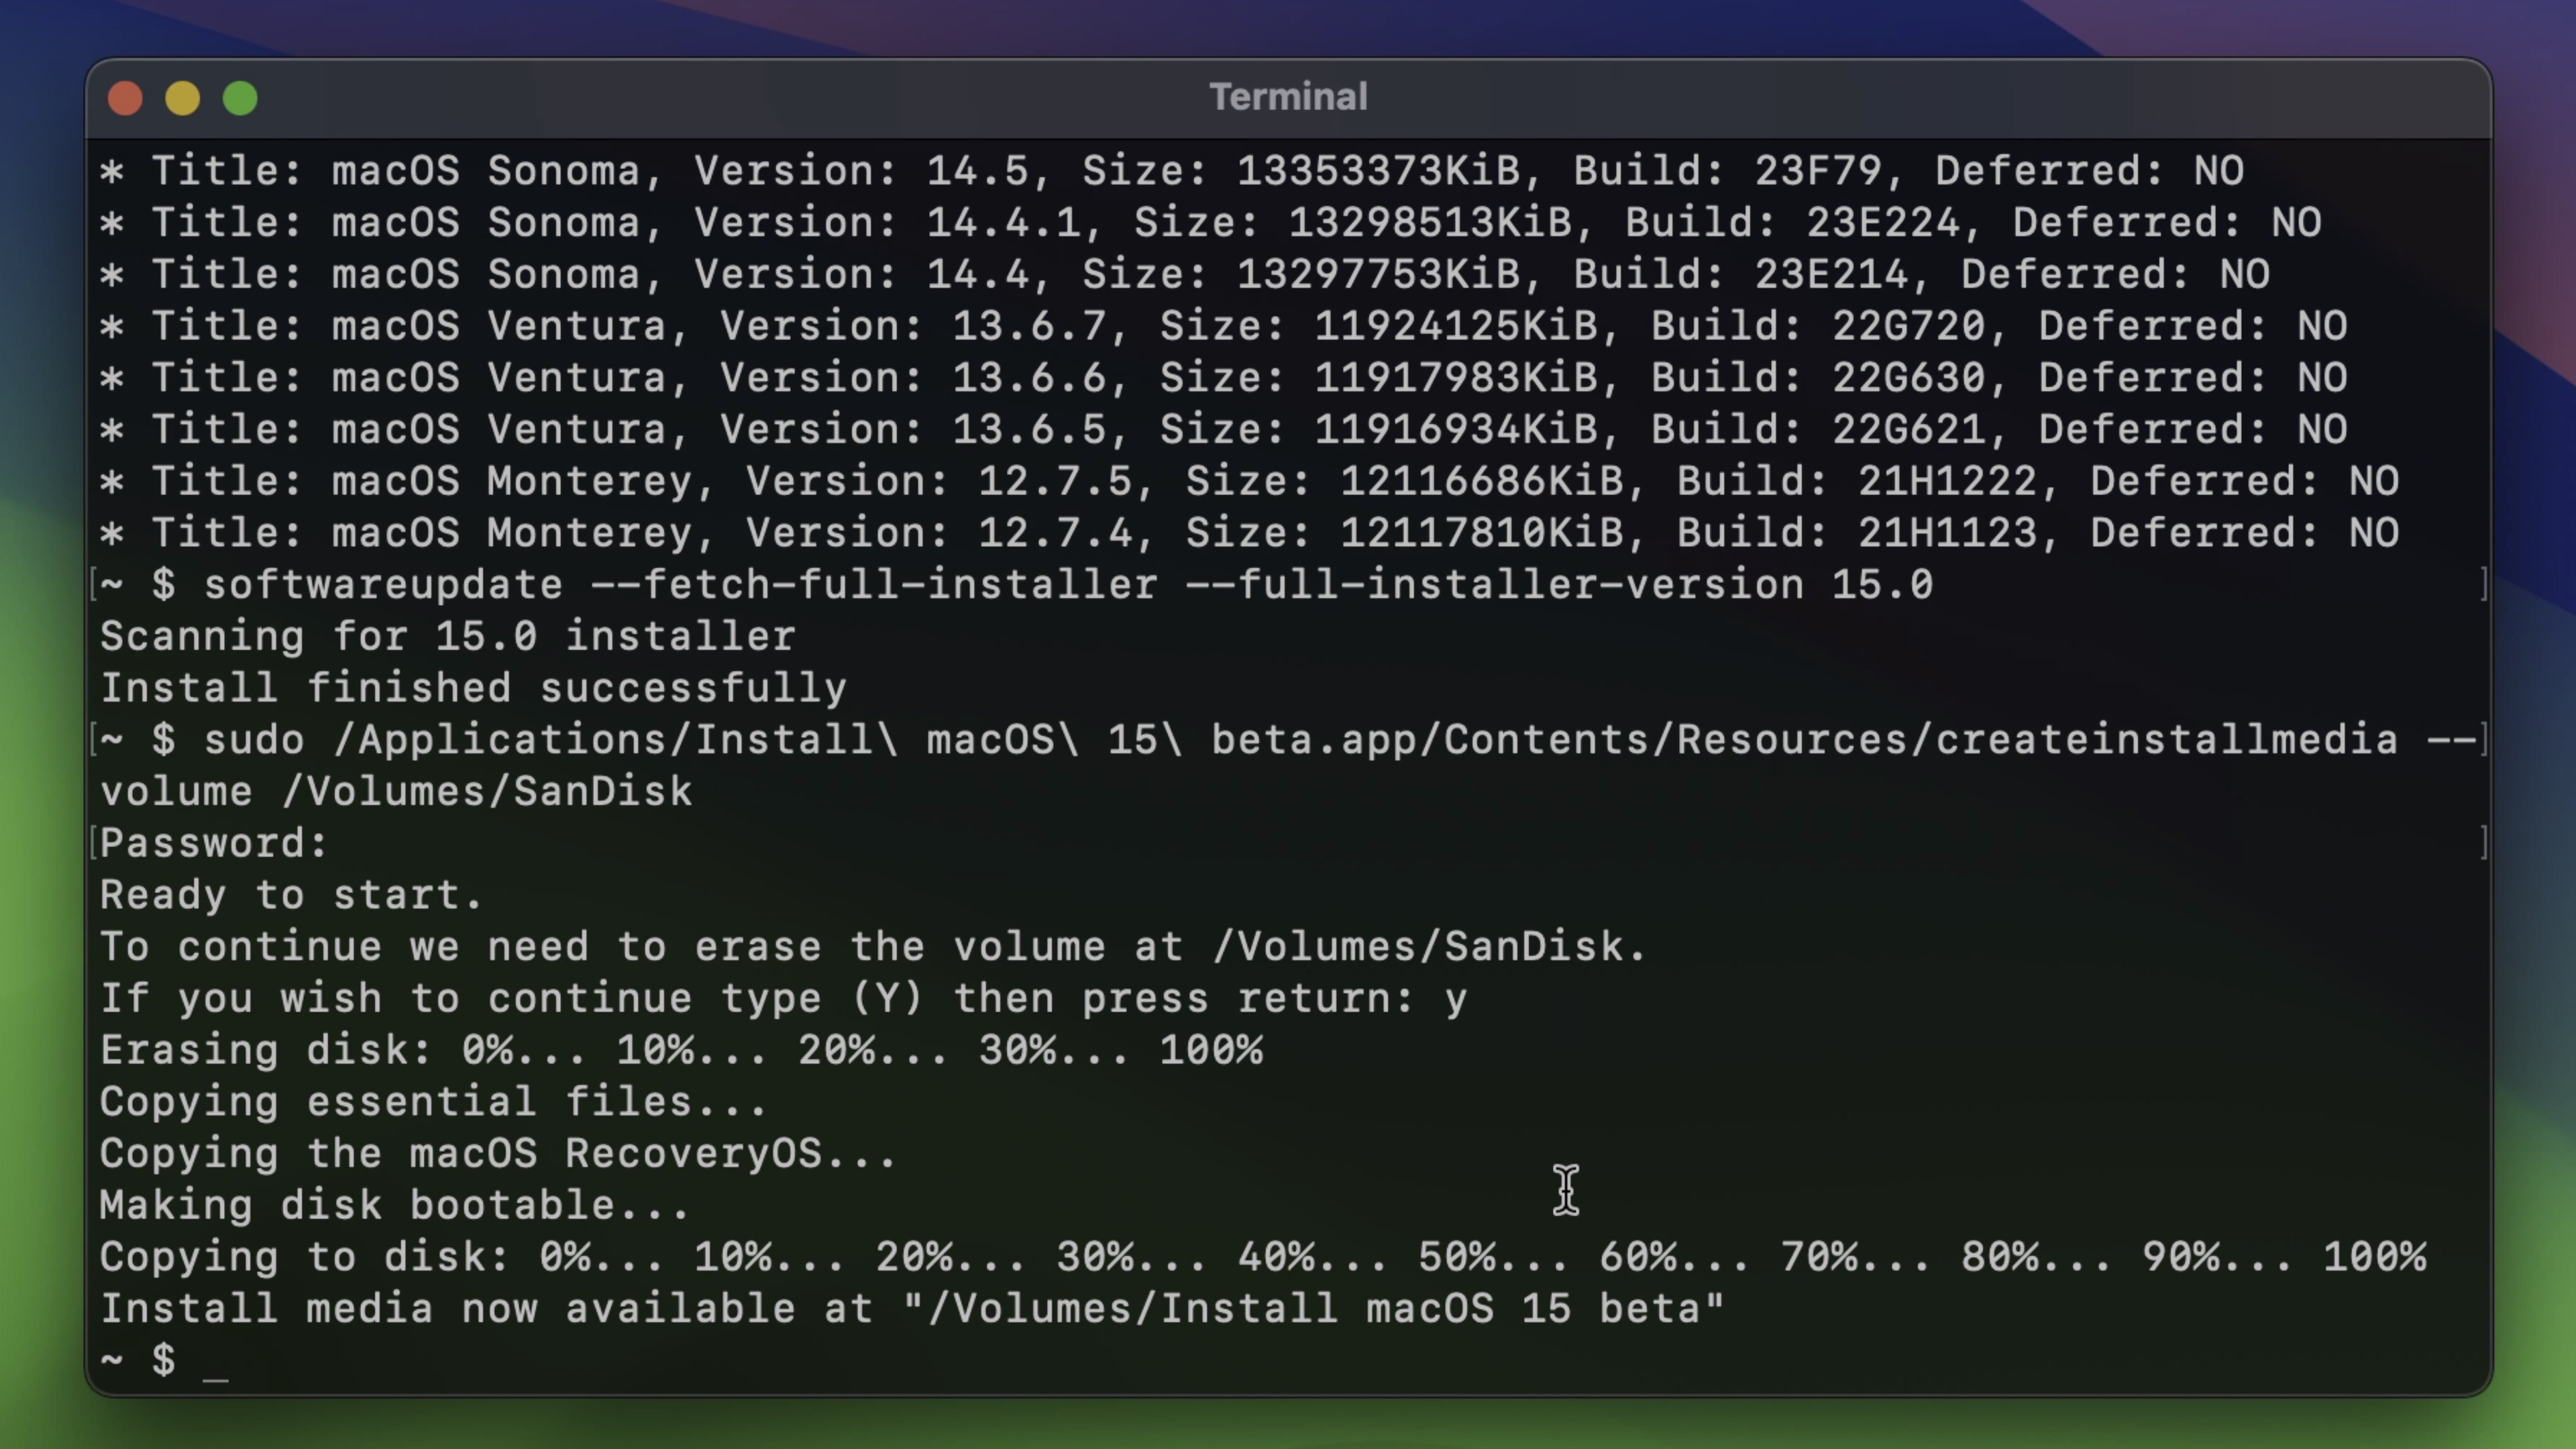
Step 13: The set up course of will begin by purging the contents of the linked USB drive, making the drive bootable, and copying the wanted installer recordsdata to the drive. This course of takes a couple of minutes to finish, so train endurance!
As soon as the set up course of is full, it’s possible you’ll eject the disk and retailer it away till you have to put it to use.
Associated video: macOS Sequoia Prime Options
9to5Mac’s Take
Making a macOS Sequoia USB installer flash drive is a quite simple course of. It may possibly prevent a lot of time in case you plan on putting in macOS Sequoia throughout a number of Macs. It’s additionally a useful instrument to have if in case you have slower web and plan on performing recent installs, and so forth.
In fact, putting in macOS Sequoia whereas in beta could be a tough promote whereas it’s nonetheless in beta, however there are strategies to make sure that you may preserve your current model of macOS Sonoma and run it alongside the macOS Sequoia beta. In an upcoming video, I’ll stroll you thru the method of putting in macOS Sequoia on a separate quantity so that you just don’t need to overwrite your Sonoma set up, and don’t need to take care of completely different disk partition, and so forth.
What do you consider macOS Sequoia to date? Have you ever tried out any of its new options like iPhone Mirroring? Hold forth down under within the feedback together with your ideas.
FTC: We use earnings incomes auto affiliate hyperlinks. More.