Wish to discover a answer to again up a number of Macs in your house or workplace with out shopping for devoted {hardware} like network-attached storage, paying for a backup service, or needing a number of exterior drives? Because it seems you possibly can arrange a shared community folder on Mac to permit different machines to save lots of their Time Machine backups. Observe alongside for the way it works.
This story is supported by Mosyle, the one Apple Unified Platform. Mosyle is the one answer that totally integrates 5 totally different purposes on a single Apple-only platform, permitting companies and faculties to simply and mechanically deploy, handle, and shield all their Apple units. Over 38,000 organizations leverage Mosyle options to automate the deployment, administration, and safety of tens of millions of Apple units every day. Request a FREE account today and uncover how one can put your Apple fleet on auto-pilot at a value level that’s onerous to imagine.

The useful function to arrange a shared community folder for backups with macOS is sort of a built-in digital NAS – or a time machine to again when Apple provided its Time Capsule router/storage combo!
Beneath we’ll cowl each learn how to set it up and learn how to configure a number of Macs to save lots of their Time Machine backups to it. There’s additionally the aptitude to share the folder with Home windows machines.
One thing to bear in mind, you’ll wish to be sure that the Mac you’re organising the shared folder on has sufficient storage to deal with backups from nonetheless many Macs you’ll be utilizing it with. It’s also possible to restrict backups to a selected measurement.
And don’t neglect to recurrently again up the Mac you’re utilizing because the shared folder host 😁 with an external drive or different possibility.
How one can arrange a shared Time Machine backup folder on Mac
On the Mac you’d wish to arrange because the Time Machine backup vacation spot:
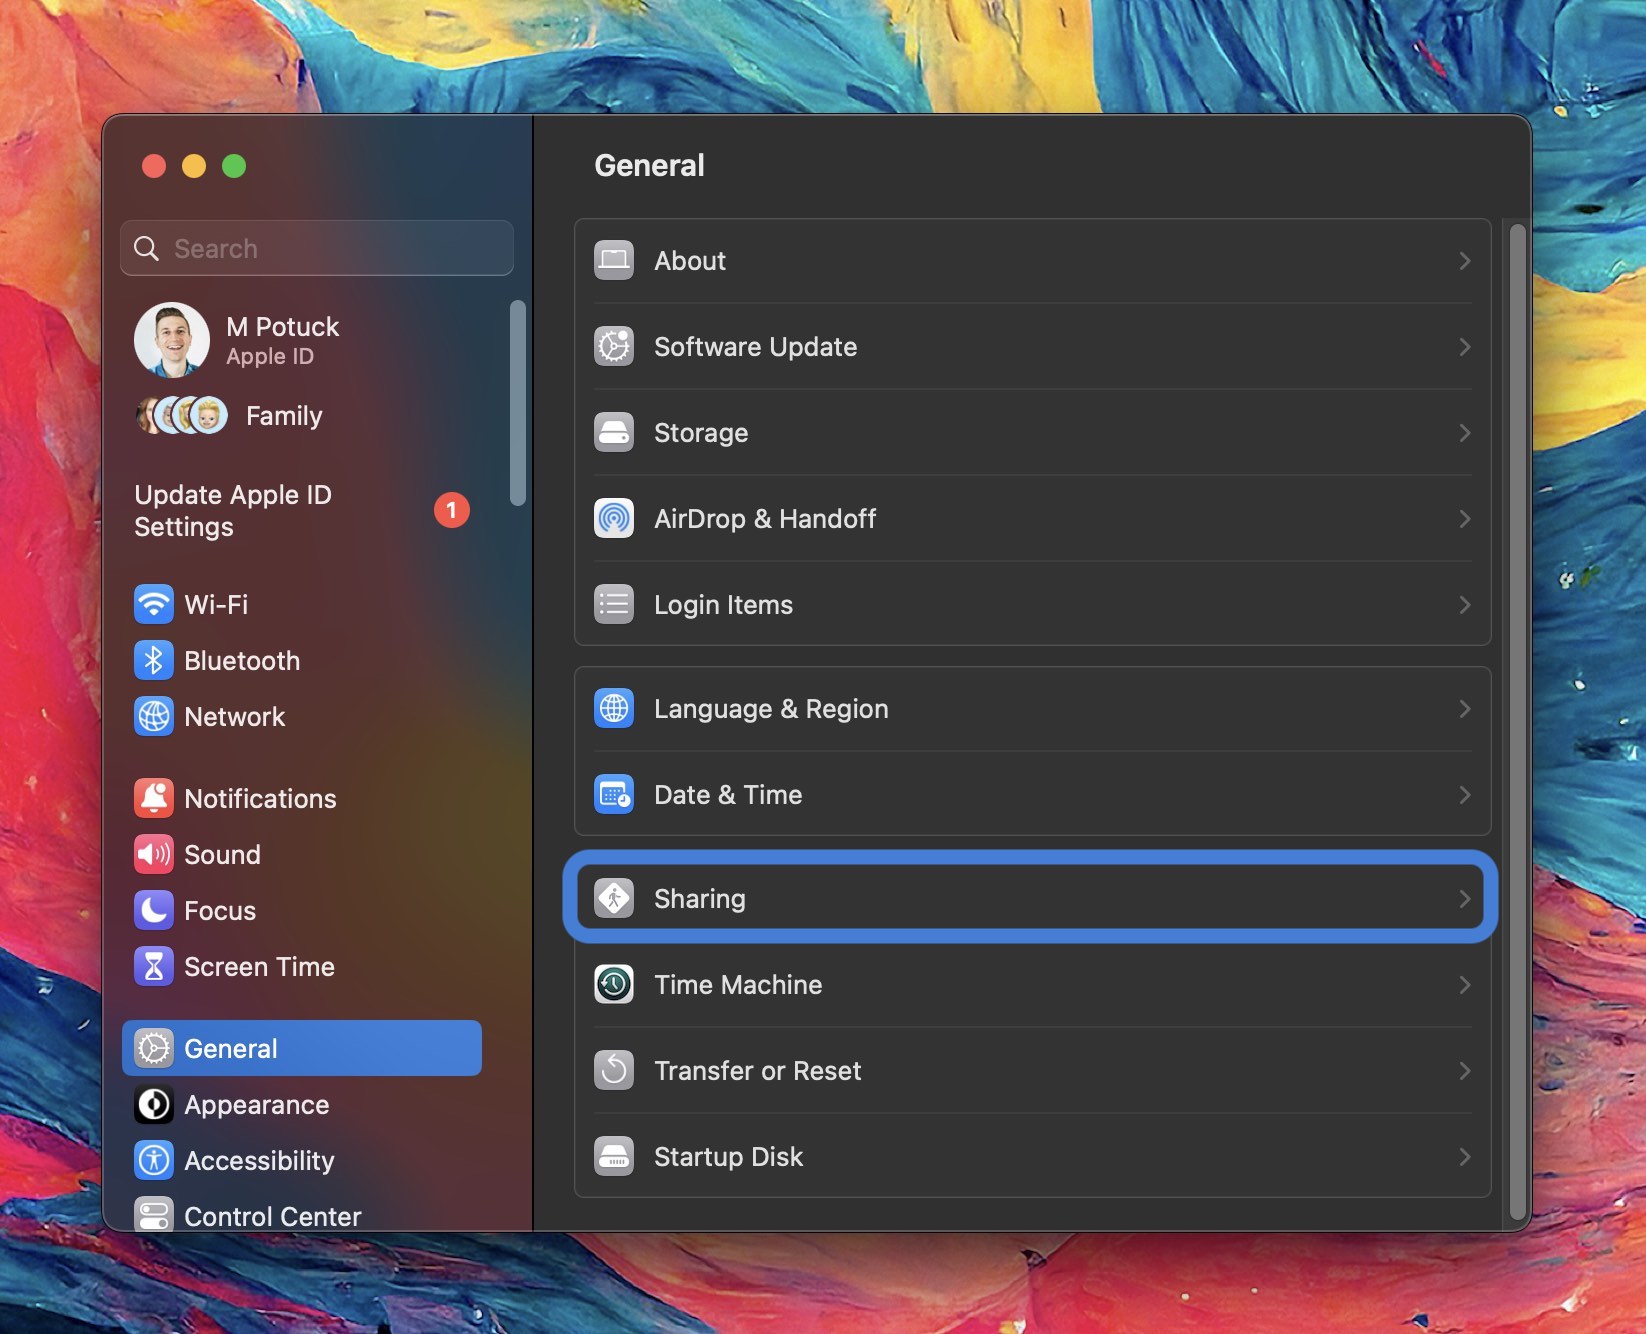
- In macOS Ventura, open System Settings > Common
- Now select Sharing and activate File Sharing – the second possibility from the highest
- Click on the “i” data button
- Now select Choices and ensure “Share information and folders utilizing SMB” is checked, click on Executed
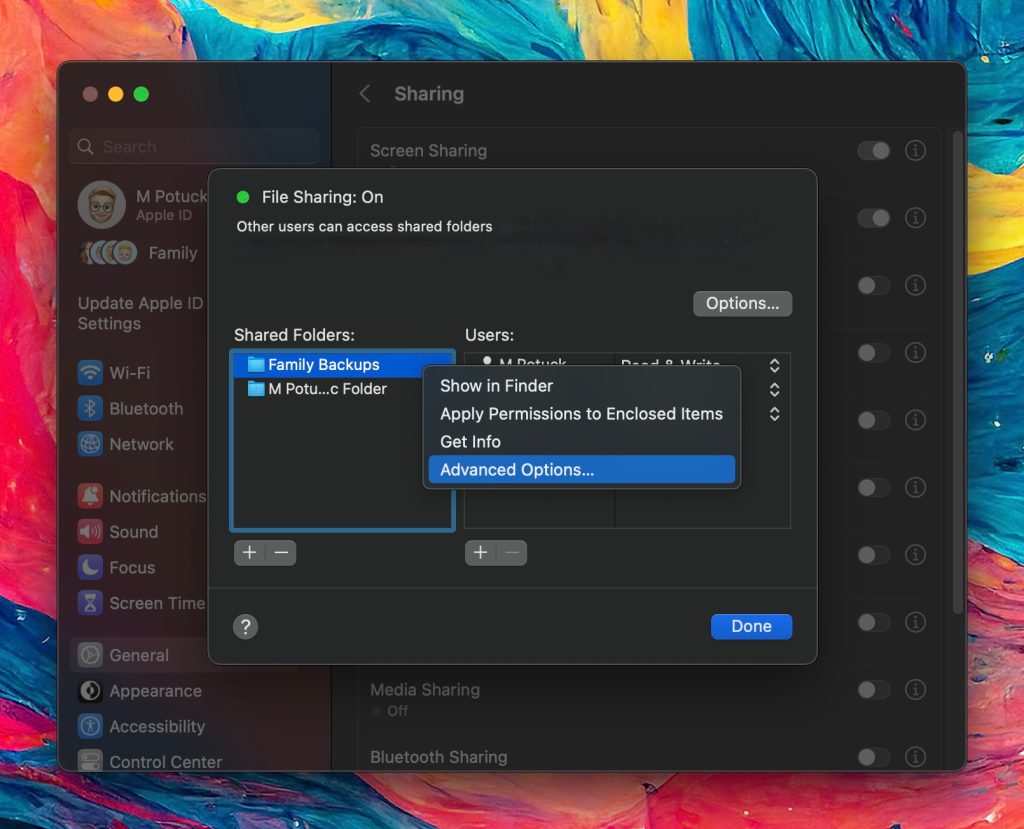
- Click on the + button on the backside of the Shared Folders checklist
- Choose the folder you wish to use (or create a brand new one) for sharing, then click on Add
- Management-click the folder identify, then select Superior Choices
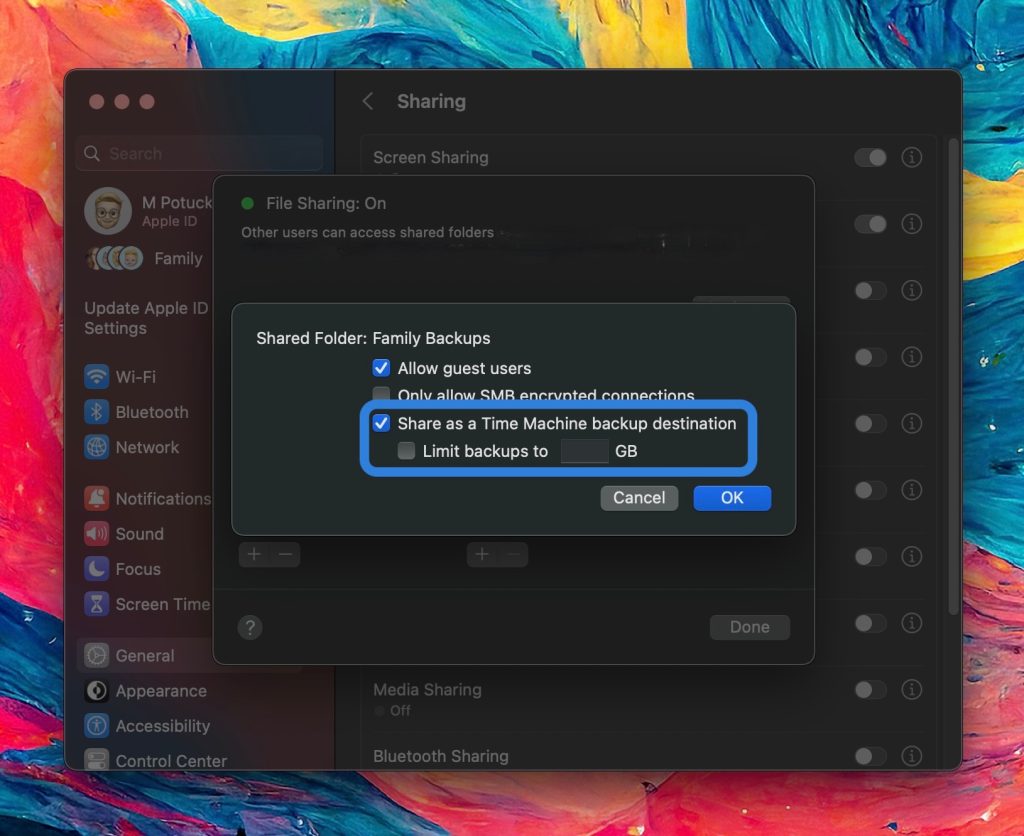
- Choose Share as a Time Machine backup vacation spot
- It’s also possible to restrict backups to a sure GB threshold
- When completed, select OK

How one can again up a Mac to a shared community folder
For the Macs you wish to save Time Machine backups to the shared folder:
- Open System Settings
- Select Common > Time Machine
- Click on the + button within the backside left nook
- Select the shared folder
Thanks for testing our information on organising a shared Time Machine backup folder on Mac!
Learn extra tutorials from 9to5Mac:
FTC: We use earnings incomes auto affiliate hyperlinks. More.